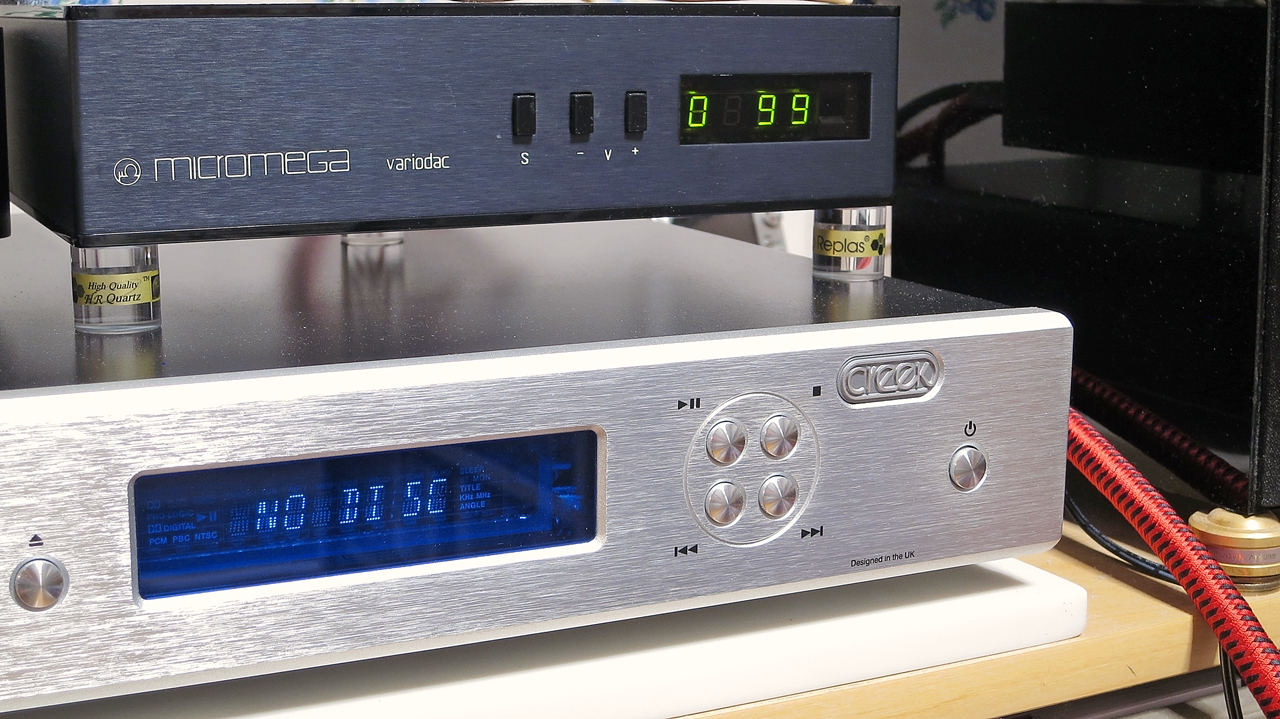
After a few days away, I tried switching on the CD player — the CREEK Evolution CD in Sub-system A — only to be greeted with a “NO DISC” display. Odd! I was sure there was a disc in there… So I opened the tray, and sure enough, there it was. I thought to myself, imported pressings can sometimes be a bit hit-or-miss with recognition, and swapped it out for a domestic pressing — only to get “NO DISC” again.

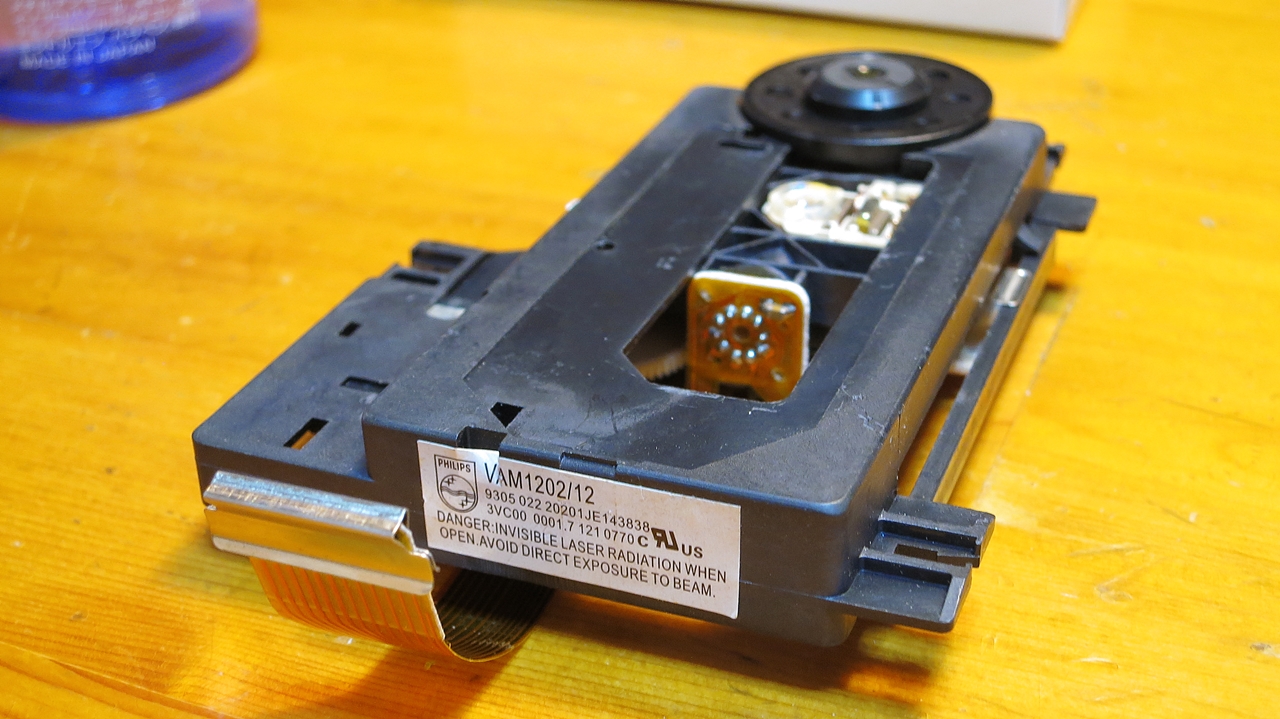
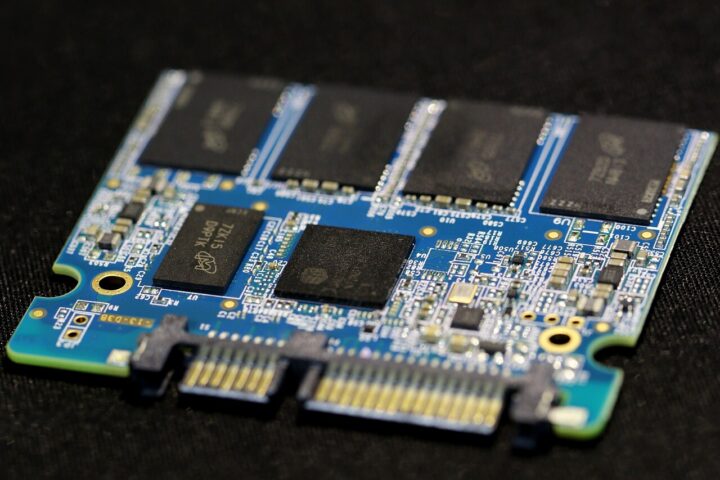
Ah yes — this is the classic case of a dirty pickup lens that can no longer read the disc… So, as one does, I went ahead and cleaned and serviced the lens on the CREEK EVO CD. As I have written before, the CREEK Evolution CD uses a PHILIPS linear tracking mechanism, the VAM1202/12 (CDM-12.x series). I am very fond of it as a transport in terms of sound quality, but this mechanism is rather fragile in its construction, and is very prone to disc recognition failures and skipping.
The PHILIPS CDM12 was a drive mechanism adopted in a great many budget-to-mid-range CD players around the world from the late 1990s through the 2000s, so it is quite a common story for machines suffering from these same minor troubles to end up as junk items at HARD OFF… and yet they can so easily be fixed…

As I have touched on a number of times in the past, I do not use the ordinary disc-type rotary CD lens cleaners. These are the kind with brushes embedded in a CD or DVD disc, available in both wet and dry varieties — but in either case, the physical load they place on the pickup lens is considerable, and they can in fact become a cause of pickup component failure. The dry type repeatedly drags a dry brush across the pickup, but you would honestly be better off just using a blower to shift any dust, and it stands little chance against oils and other deposits that have settled from the air. The wet type (the included liquid is mainly alcohol-based) can do an actual cleaning job, but the physical load on the pickup components is even greater. ※ If the pickup is not visible from the tray opening and disassembly is difficult, I would first recommend a non-contact rotary cleaner that works by air pressure. You cannot expect it to be as effective as a wet brush-contact type, but if the cause is simply a light accumulation of dust, the non-contact type is the safer option.

Attempting a manual pickup lens cleaning on a CD player
I told myself it had only been a moment since I last cleaned the lens on this CD player, but when I checked my records, it turned out the last time I had the lid off was 7th April 2017 — nearly one year and eleven months ago. Time really does fly. At close to two years, this is just about the point where the lens tends to get dirty enough that playback becomes impossible, so this is very much a routine maintenance job. For the record, this is a non-smoking environment.
With the CREEK Evolution CD, the disc reading would fail roughly every two years or so, and in fact I now leave all the top cover screws permanently removed (four on the left and right sides, three at the rear). Part of the reason is that maintenance becomes a little easier when a read failure does occur, but with this particular model, leaving the screws out also seems preferable from a sound quality standpoint — the mechanical stress caused by tightening the steel panel cover no longer finds its way into the sound. ※ Without the screws, the sound takes on a slightly looser, more open quality. Whether that is a good or bad thing will depend on the model and how it fits within the rest of your system, so it is worth knowing that you can adjust the sound to some degree simply by varying the torque on your player’s top cover screws.

The pickup lens looks clean to the eye, but it is dirty. First, open the tray and switch off the power. The CDM12 has the lens set back in a somewhat awkward position, but by shining an LED torch at the mechanism from the side, you can work a cotton swab — one free of chitosan and similar additives, such as a modelling or industrial swab (model-making swabs, industrial-grade swabs, etc.) — moistened with IPA isopropyl alcohol (99.9%) in from the side of the drive mechanism, and gently clean the circular lens surface by rotating the swab. The pickup lens will twitch up and down slightly by its very nature, but be careful not to apply any force beyond that. If you are going to try this yourself, you do so at your own risk, and bear in mind that applying the wrong kind of pressure will break it surprisingly easily — so please take the utmost care.

As I have written before, however, the commonly available rotating-contact lens cleaners are structurally quite violent pickup lens crushers, and I would strongly advise against using them under any circumstances. Except with top-loading CD players such as those made by CEC, you will need to open the player’s lid, but careful cleaning by hand remains the best approach — the one that puts the least strain on the pickup. After wiping the lens with the swab, wait around three minutes for it to dry, then switch the power on and confirm that the player reads a disc normally.
When the CD tray fails to open or close…
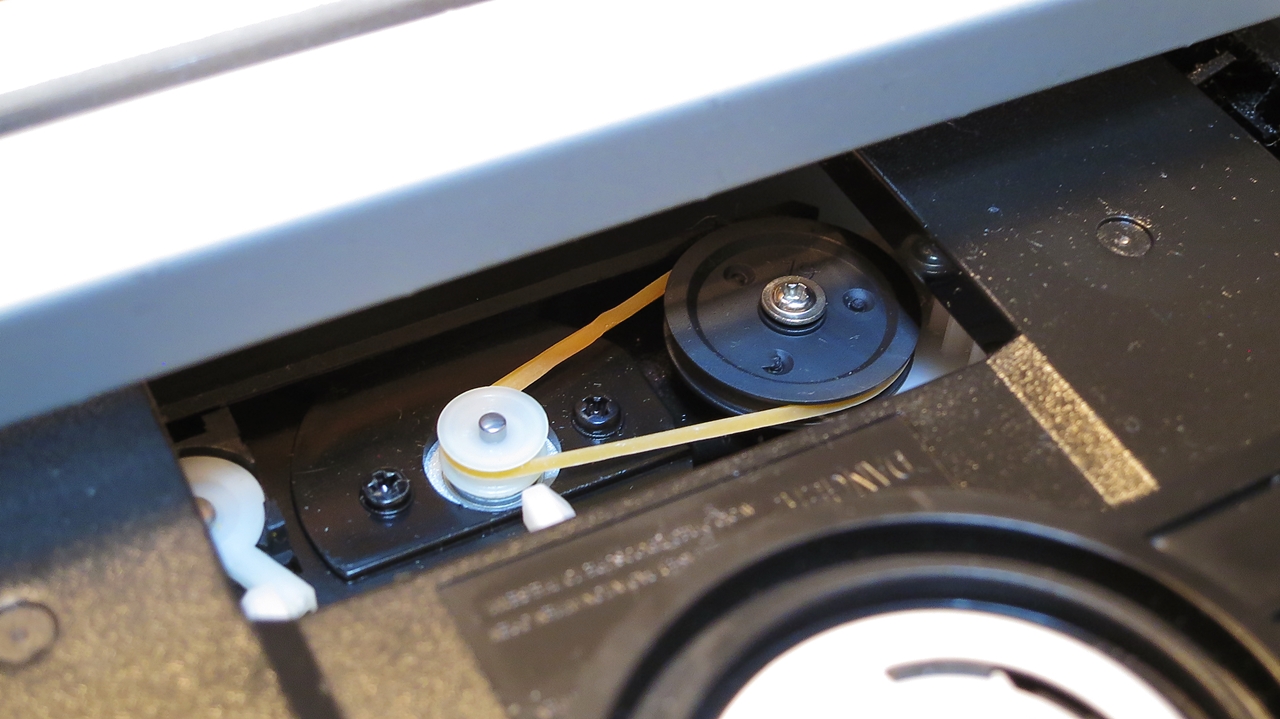
Come to think of it, a few years back the rubber belt for the tray loading mechanism had stretched out and the tray was opening and closing badly — and I ended up just substituting an ordinary rubber band I had lying around. The original was a 1mm square-section rubber belt, Φ28mm, but sourcing the proper part felt like too much trouble. Because the elasticity is stronger than the dedicated rubber belt, the tray movement is a little jerky, but it will probably keep working until the rubber perishes and snaps. There are generic rubber belt assortments for drive mechanisms sold in bulk, packs of mixed sizes, any number of them — but the 28mm ones don’t seem to come up very often.
![]() Search for rubber belts for CD player repair and restoration【PR】
Search for rubber belts for CD player repair and restoration【PR】
【Yahoo! Shopping】【Rakuten】【Amazon.co.jp】
For serious skipping, replacement of the pickup assembly becomes necessary
Right — there is that skipping problem which first appeared two or three years after purchase, occurring in the outermost area of the disc, past the 65-minute mark on longer CDs. In the end I have simply carried on using it for ten years without it getting any worse, but against the day it finally gives up properly, I did at some point order what may be a genuine PHILIPS replacement pickup assembly, and I keep it here to hand. Note: it may in fact be a compatible part rather than genuine.
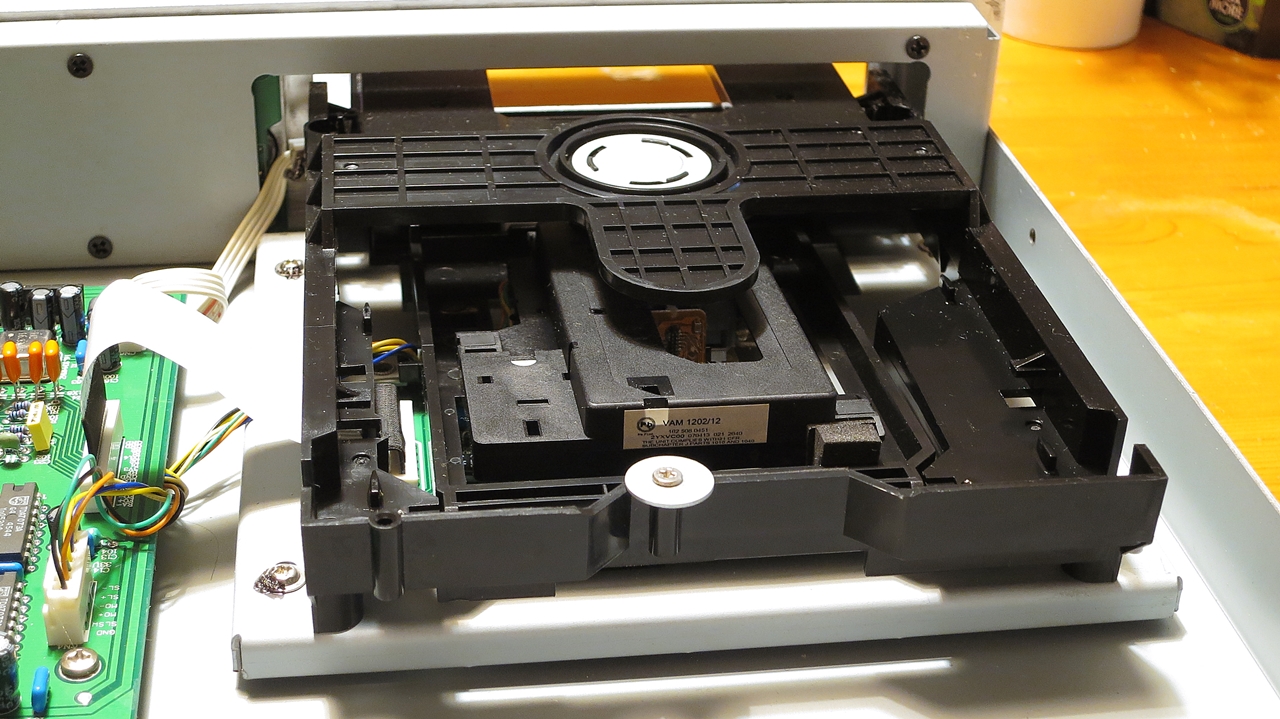
I had a little energy to spare this time, so I decided to have a go at seeing whether I could swap in one of the new old-stock pickup ASSYs I have sitting around — which meant pulling the VAM1202 drive mechanism itself out of the CD player. The drive mechanism is secured with just four Phillips screws, one at each corner. The tray can stay as it is. There are two flexible signal cable connections and two power supply lines running from the main board, but anyone who knows how these connectors work should be able to disconnect them with a simple one-touch pull. (I left the power supply wiring connected this time.)
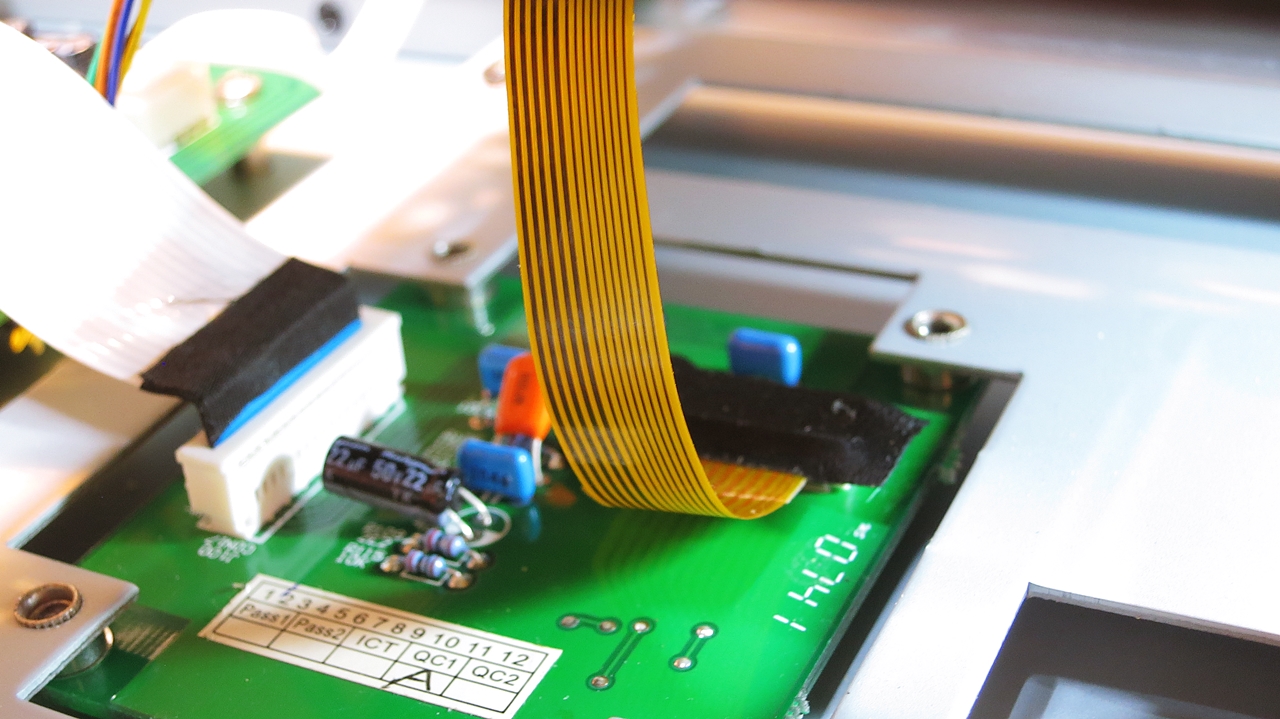
The connector for the flexible cable linking the drive mechanism to the board directly beneath it had, for some reason, been masked over with black cloth insulating tape… What on earth is that for?
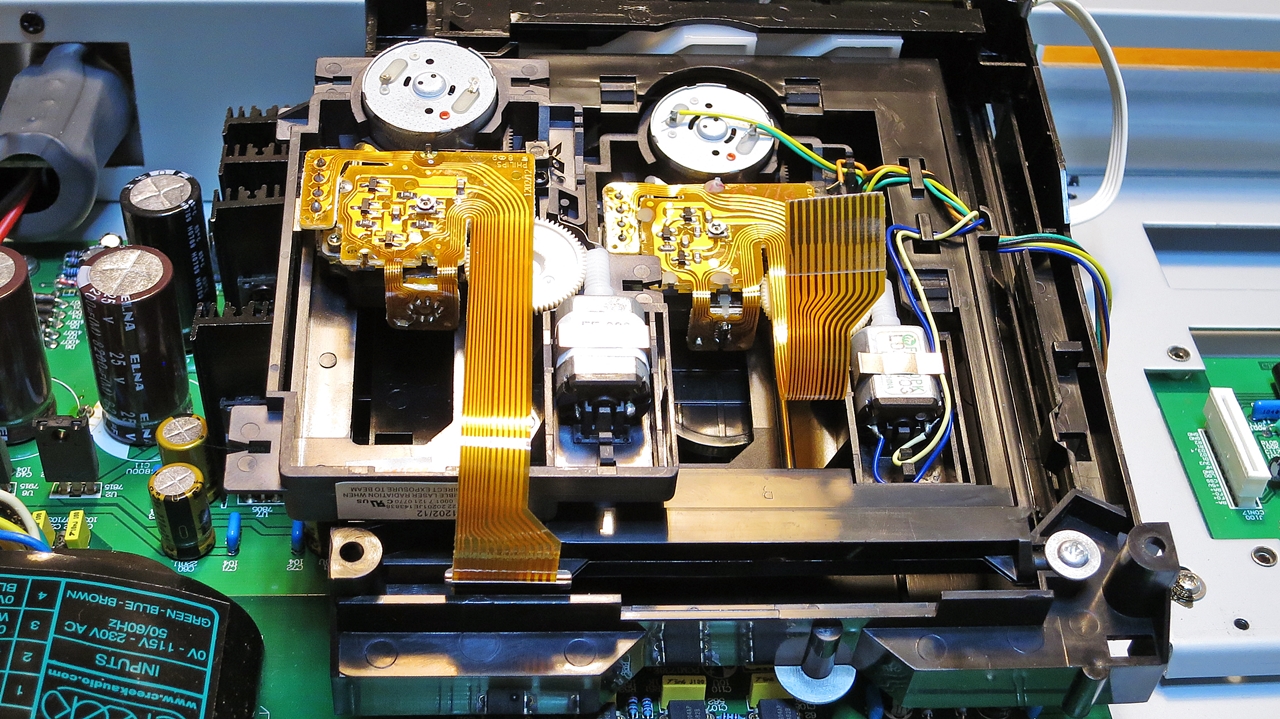
Flipping the drive mechanism over gives you this view (the one on the left is the unused ASSY) — and I was able to confirm that the new old-stock PHILIPS VAM-12x series pickup module is an exact match for the one already fitted. The unit originally installed in the player is a compatible pickup, so the flex cable pattern is ever so slightly different, but they are essentially identical. The pickup that came in the mechanism was most likely a PHILIPS-compatible drive fitted by the Chinese manufacturer (Shanling), so swapping it out might actually improve the sound quality… Incidentally, while this is a full drive ASSY including the various motors, it is also possible to obtain just the compatible pickup unit on its own.
![]() Search for VAM1202 pickup units [PR]
Search for VAM1202 pickup units [PR]
【Amazon.co.jp】【Rakuten】【Yahoo! Shopping】
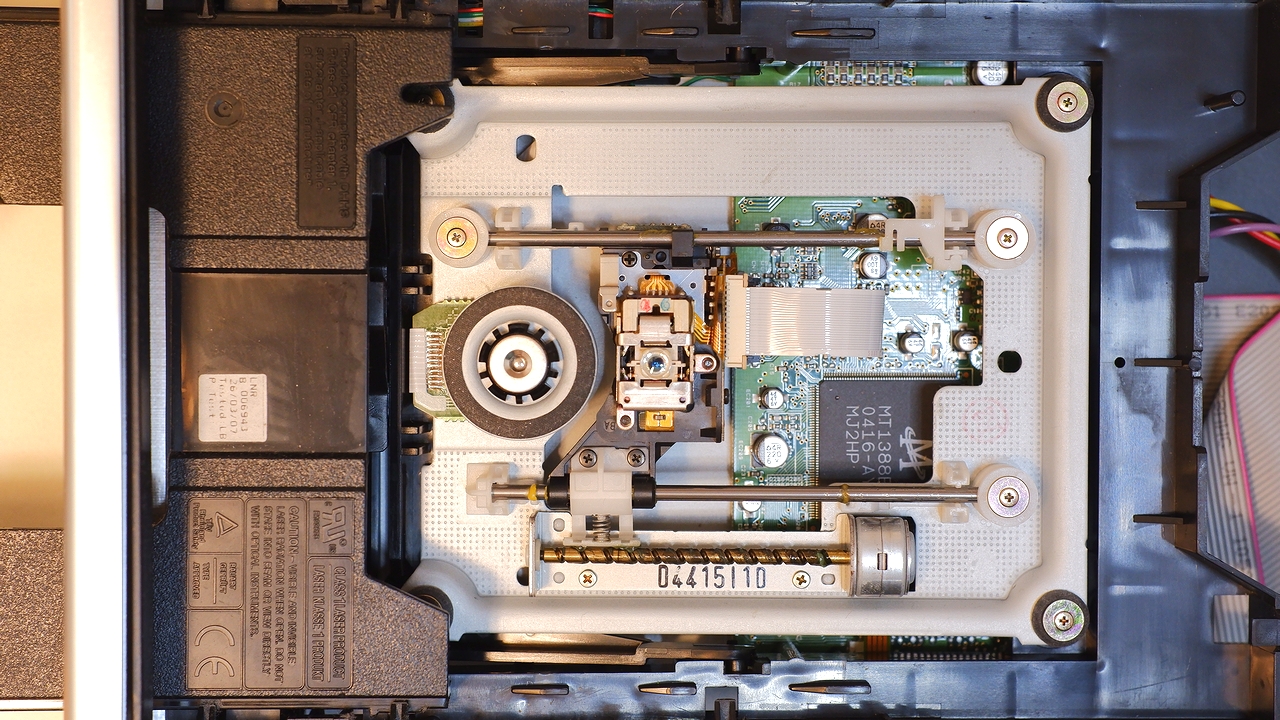
And here is where a problem arose. I hadn’t realised this before, but the three power supply lines connecting the pickup module to the drive mechanism base (each supplying power to one of the two motors and the lens unit respectively) require soldering and desoldering at six points — and rather fiddly ones at that. Since I don’t have a soldering iron suited to precision work (and consequently have no soldering technique to speak of), I imagine someone experienced could finish the job in ten minutes, but as there is no margin for error, I had to call it quits right there — orz
In any case, in practical terms I’m not really troubled by it — the skipping only occurs occasionally, at the outermost tracks — so I’ll carry on as before and keep using it as-is. Incidentally, cleaning the pickup lens does reduce how often the skipping happens. Though, honestly, I have a feeling that at this point it might actually be fixable with just a laser output adjustment (VR adjustment) alone…
I did also attempt a laser output adjustment, but it seems the laser output had already weakened too far with age, and unfortunately the problem did not go away.
On Philips CD mechanisms CDM12 and VAM1202, the effect of turning the variable resistor (VR) on the flexible circuit board on laser output is as follows.
· Clockwise (right): Laser output increases.
· Counter-clockwise (left): Laser output decreases (resistance value increases).
· Counter-clockwise (left): Laser output decreases (resistance value increases).
· Fine adjustment: Adjusting the laser output is an extremely delicate operation. Do not turn it all at once — turn it only a small angle at a time, equivalent to about “5 to 10 minutes” on a clock face, and check operation after each adjustment.
I put the drive mechanism back together and tried playing it again with the sub-system — and the sound was somehow more distorted than before. There’s more resonance than before, yet it feels oddly dull. Oh, I wonder whether the four corner Phillips screws on the drive mechanism were too tight — I didn’t intend to over-tighten them, but perhaps they were. Hmm…
More Important Than You’d Think ♪ — Sound Quality Changes Caused by Digital Cable Interference
At this point I began to wonder whether something had changed between before I removed the CD player from the system for maintenance and after I put it back. Normally, the digital cables running from the CREEK EVO CD to the DAC are connected via both TOS (optical) and coaxial — two separate outputs, both going into the same D/A converter (※ currently the Micromega VARIODAC, which is under maintenance) — but when I reassembled everything this time, only the optical digital cable had been connected.
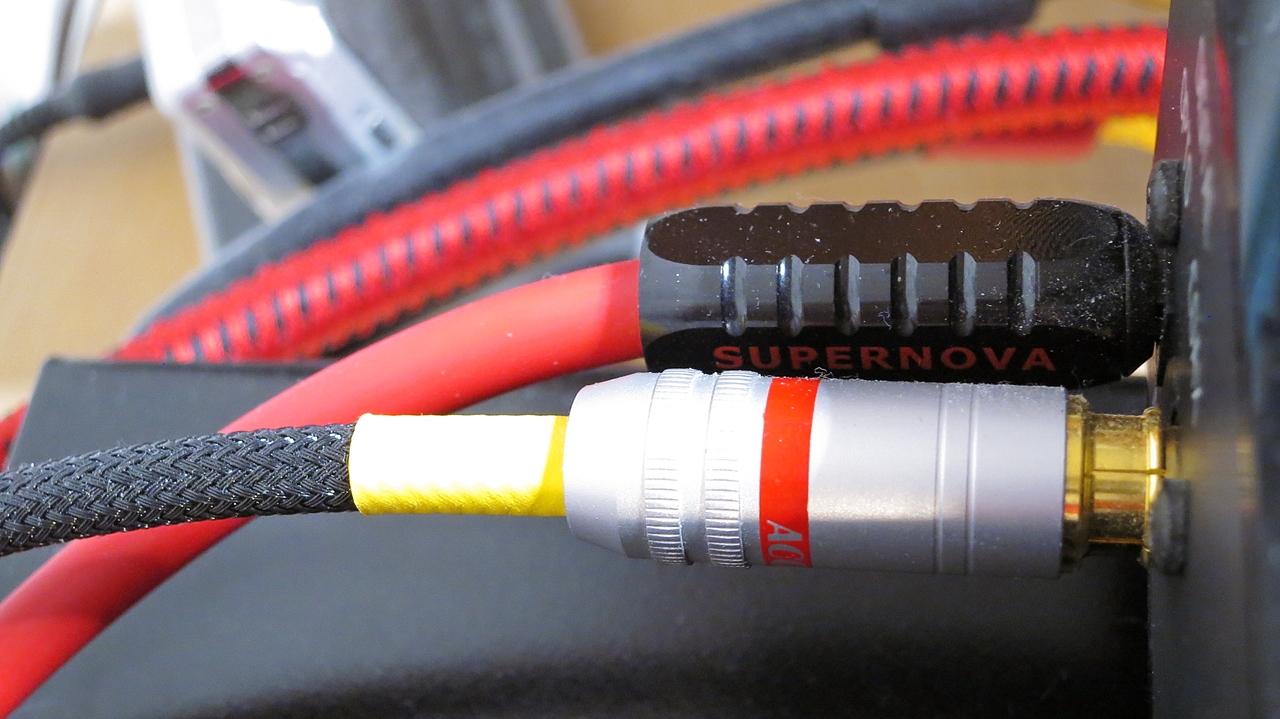
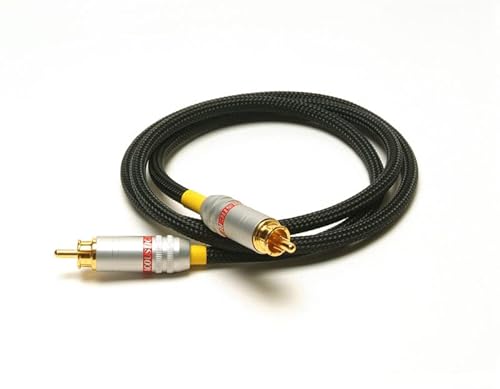
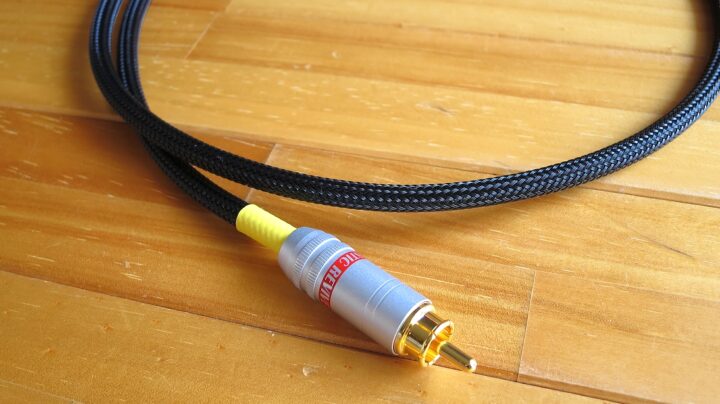
The TOS-Link (optical digital) is connected with a Wireworld Super Nova 7, and the coaxial digital with an Acoustic Revive DIGITAL-1.0R-TripleC-FM — but since I almost exclusively listen via the Wireworld Super Nova 7 side out of pure sonic preference, I’m starting to think I may not need the Acoustic Revive digital cable at all…

And yet, the Acoustic Revive DIGITAL-1.0R-TripleC-FM — perhaps owing to the Finemet core built inside it — has a way of tightening up the sound of the whole system simply by being plugged in, even if no audio is actually being output through it. It was only now that I remembered that was precisely why I had kept it connected in the first place, despite it almost never being used for actual playback.
So, rather than being lazy about it, I went ahead and reconnected the Acoustic Revive DIGITAL-1.0R-TripleC-FM I had removed, wiring it back exactly as before — and the sound returned to very nearly what it had been before I opened the lid. A slight sense of listlessness also disappeared after 24 hours of burn-in (this sort of subtle change when you disconnect cables, open the lid, or remove and reattach the drive mechanism is simply unavoidable). With an optical digital cable alone, no electrical interference or ground loops along the digital signal path arise between the DAC and CDP — but with a coaxial cable, there is likely some influence from the ground line being electrically connected along the digital signal line. In the case of this sub-system’s configuration, the ground lines of the CD player and DAC are in any case shared indirectly via the power distribution box regardless — and yet, even so, the presence or absence of a coaxial digital cable connection (on the side not actually outputting sound) makes quite a noticeable difference to the ear.
And it is not limited to Acoustic Revive cables, either — when different types of digital or analogue signal cables are connected in parallel to a piece of equipment, the cable on the side not actually being listened to can have a not inconsiderable tonal influence, and there is quite a lot of depth to explore here. I am thinking I might write about this in more detail on another occasion.
![]() Audio Equipment Maintenance
Audio Equipment Maintenance![]() UK / CREEK · EPOS / EMF
UK / CREEK · EPOS / EMF
List of comments (3)
何度CD入れてもノーディスク…での修理工法教えて頂き、ありがとうございました!
試しにドライバー、綿棒、クリーニング液、接点油を用意し分解掃除していました。
その後、カバーをして視聴したら好音質戻りました。
感謝しています。ありがとう♪o(^o^)o
CDを入れてもずっと読み込み中。
聞けても最初の一曲めで切れてしまいます。
ずっとこのような調子なのですがどうすれば良いでしょうか?
こちらの記事は、CDドライブメカ本体にアクセスする知識のある皆様向けの技術解説になっています。
オーディオ及び電気機器への知識が全くおありにならない場合は、ダメ元で一般的なCD型の湿式ピックアップレンズクリーナーをトライされるか、故障として修理に出されるしか無いです。
https://www.audiostyle.net/archives/22022587.html
https://amzn.to/3LUHWVY