【Better Practices for Pure Hi-Fi Amplifiers】
7 Mistakes|15 Points to Watch
When integrating a dedicated integrated amplifier or separate amplifier — designed for pure Hi-Fi use — into a complete audio system, there are actually quite a number of points worth paying attention to that are specific to amplifiers, distinct from other source components or speakers; and yet, I think these points are seldom discussed in any systematic way.
This time — covering solid-state analogue amplifiers, digital amplifiers which have been increasingly becoming the mainstream in recent years, and valve amplifiers alike — I would like to present, as a supplementary piece from the author of the miniature-garden-style “AUDIO STYLE”, some points regarding the day-to-day maintenance and operation of stereo audio amplifiers that were not touched upon in the WHAT Hi-Fi article introduced previously.
The Need for Warm-Up
It is something often said among Hi-Fi enthusiasts: all audio equipment, to a greater or lesser degree, tends to sound dry or somewhat distorted in the early moments after being switched on, and amplifiers in particular include quite a few models that are rather sluggish out of the gate. In order for each component to warm up and deliver its true sound quality, it is better to allow at least 30 minutes to an hour of idling after switching on — until the internal temperature has fully stabilised — at which point you will get better sound with more detail and less distortion.
Some high-end amplifiers from overseas manufacturers implicitly assume continuous operation, and it is not uncommon for such units to have the main power switch positioned deliberately out of easy reach on the rear panel, separate from the front-panel power button (which toggles between standby and on). If you tend to switch the amplifier on just before listening — out of concern for the electricity bill — it may be worth knowing that you are likely not enjoying your music at the component’s true, settled sound quality.
Points to Watch When Switching the Power On and Off
When switching the amplifier on or off, always turn the volume down to its minimum first. This was more or less common knowledge among Hi-Fi enthusiasts of an earlier era, but as amplifiers with digital volume controls have become more prevalent in recent years, it has been spoken of less and less — so there may well be quite a few people who are simply unaware of it. As for the order in which to power up the various separate components in a Hi-Fi system, the general principle is as follows, so as to avoid pop noise and similar transients at switch-on or switch-off from entering the amplifier and causing damage to the power amplifier circuitry or the speakers.
This is to prevent damage to the speakers and power amplifier circuitry from inrush current overflow on initial power-up, incorrect inputs, high-volume signals, and the like. Apparently there is also the benefit, should the contacts of a mechanical rotary volume develop crackling noise due to age-related deterioration, of keeping the affected area outside the range normally used. ※ Crackling tends to develop around the volume position used most frequently. Of course, the great majority of modern audio equipment does include mute relays, fuses, and similar protective measures at various points in the circuitry, so that power-on and power-off noise and overcurrent do not cause mutual harm. Even so, from personal experience, I feel it is by no means uncommon for those safety circuits to fail to operate correctly — or for fuses to blow — due to initial defects, age-related deterioration, or sudden anomalies in the power supply environment.

Leave it on all the time, or switch it off when not in use?
Separately from all this, I make a point of keeping the number of power on/off cycles for each piece of audio equipment to a minimum. When I am at home, at least one system is kept on more or less continuously; when not in use, it runs in standby mode. I am particularly careful with the amplifiers and valve-equipped components at the heart of each system, trying not to let the cumulative on/off count creep up. The main power switch is turned off only when I need to physically work on the equipment for maintenance or similar purposes, or when I am away from home for an extended period.

In standby mode, particularly with equipment made outside Japan, standby power consumption is often surprisingly high — yet I still do not switch off the amplifier’s main power, nor do I unplug it from the wall. Repeatedly plugging and unplugging thick, heavy, inflexible Hi-Fi power cables risks breaking the cable internally, and also causes wear and deterioration of the plated plug contacts. More importantly, it puts considerable strain on dedicated Hi-Fi outlets and power distribution boxes: the repeated pulling and reinserting gradually loosens the fit, and the sound changes in ways that cannot be undone.
When it comes to the age-related deterioration that damages amplifiers and other audio equipment, heat generated during operation is one factor — but the cumulative damage from inrush current at power-on is actually not negligible either. It is true that higher temperatures accelerate the degradation of capacitors and other components, but in my view, running equipment in a near-continuous state and keeping it stabilised at its design temperature, versus repeatedly heating it up and cooling it down, can in some cases result in greater cumulative damage to the components with the latter approach.
※ One occasionally sees people who unplug every appliance in the house in the name of saving electricity. However, modern Japanese-made appliances — along with most other recent equipment — draw extremely little standby power, so if you actually measure the figures and do the maths, unplugging things specifically to reduce standby consumption is, in almost every case, a wasted effort. If anything, it only increases the risk of latent wear and failure in your appliances, so I would not recommend it.
As for electricity bills — Hi-Fi is, at the end of the day, a luxury hobby, and a certain degree of acceptance is unavoidable. Personally, the recent wave of electricity price rises is genuinely painful, but when you consider the cost of each component, its availability, and the expense of repairs should something go wrong, wearing out your amplifier and other equipment prematurely is surely the worse option…

The ELPA Eco Keeper is a simple power meter that I use myself. Once you start using one of these devices, you quickly discover that quite a number of audio components and household appliances have actual measured consumption figures — during active use, idling, and in standby — that differ considerably from the published catalogue specifications.
When Switching the Power On and Off Can Actually Help
This is a piece of practical knowledge that somewhat contradicts what I said earlier. When I was running the AUDIOLAB 8300A in a near-continuously-powered state partly for burn-in purposes, I occasionally found the sound had become strangely too sluggish and laid-back. At such times, putting the amplifier into standby for a few minutes and then switching it back on again would produce a surprisingly fresh, vivid sound. I cannot explain why, and whether this effect applies universally to other amplifiers is unclear — but since the domestic mains supply is constantly fluctuating, even a stable powered state is not electrically unchanging, and the inrush current from switching on and off may in some cases bring a kind of reset-like refreshing effect. Because of experiences like this, I personally try to keep continuous power-on periods reasonably long while avoiding frequent switching, but without going to a completely always-on approach — letting the equipment have a proper rest now and then.
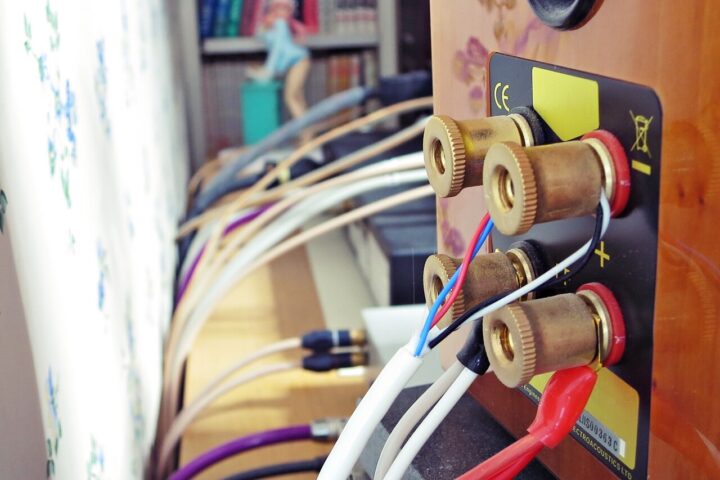
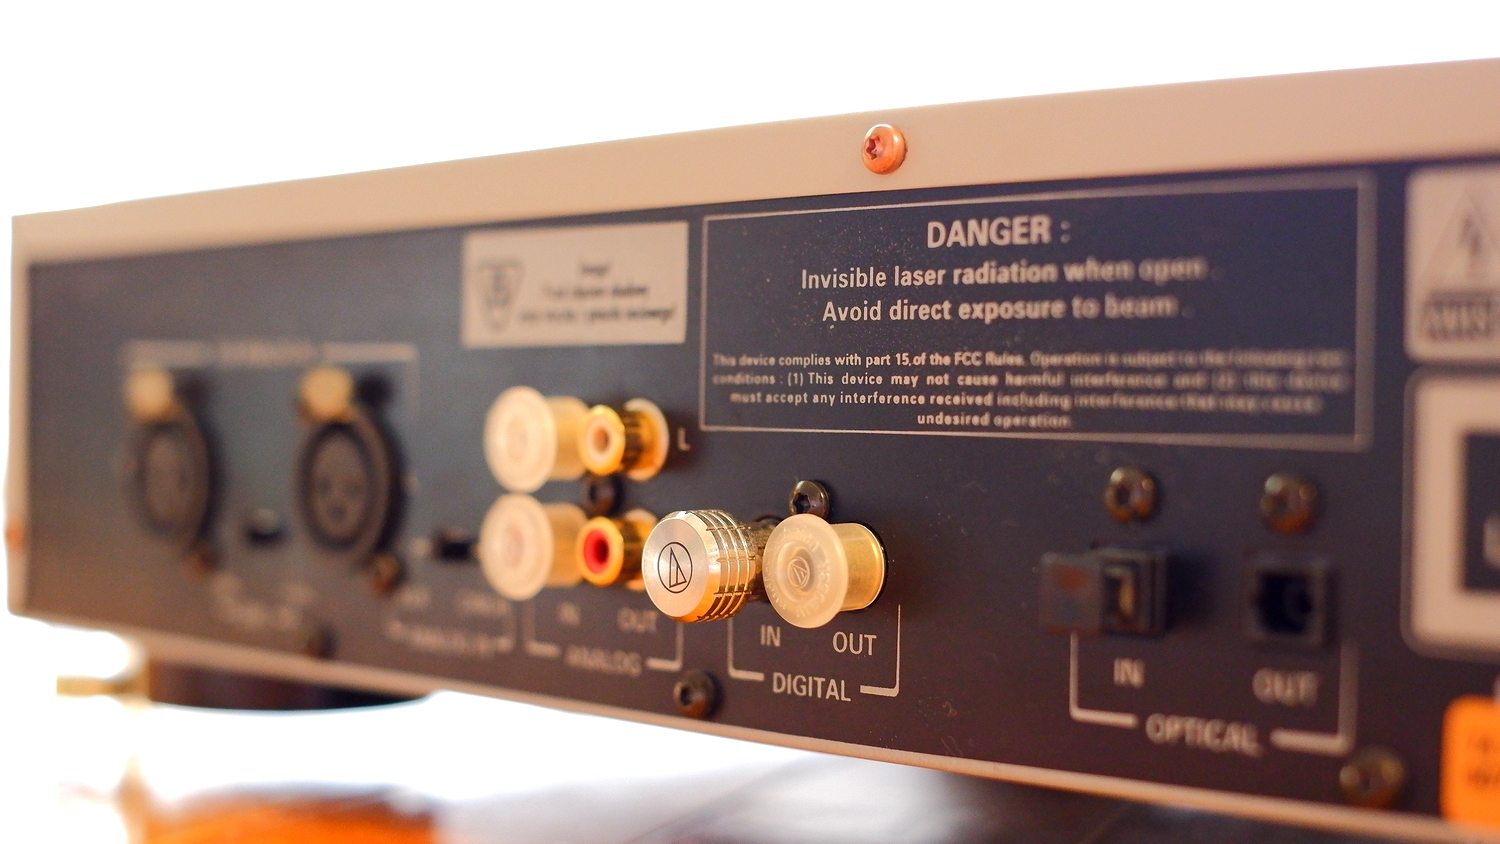
Check periodically that the speaker cable binding posts are not coming loose
Speaker cable binding posts, which make contact by tightening with finger pressure, will naturally work loose over time on both the amplifier and speaker sides, partly due to vibration and similar factors. If you tighten them so firmly that they cannot loosen at all, you risk the opposite problem — the posts seizing up and becoming impossible to remove, or damaging the rear terminals of the amplifier or the plugs themselves. The appropriate torque also differs from one piece of equipment to another, which makes judging exactly how tight to go rather difficult.
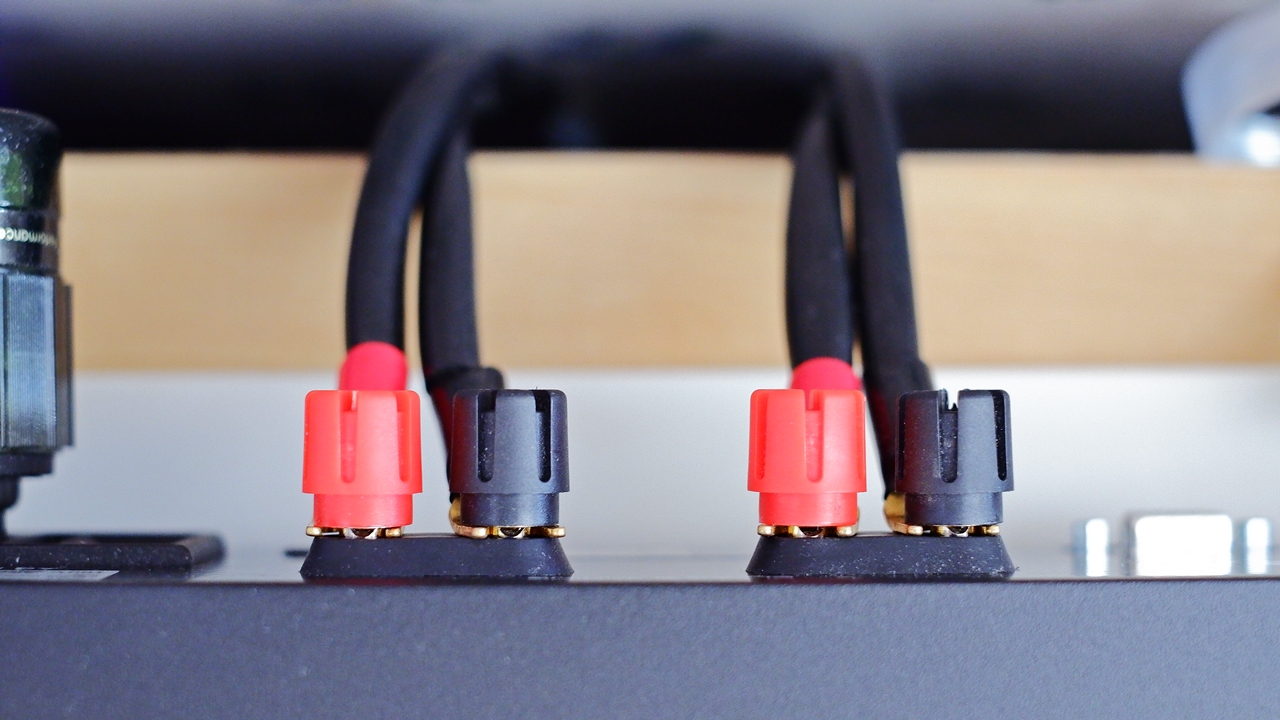
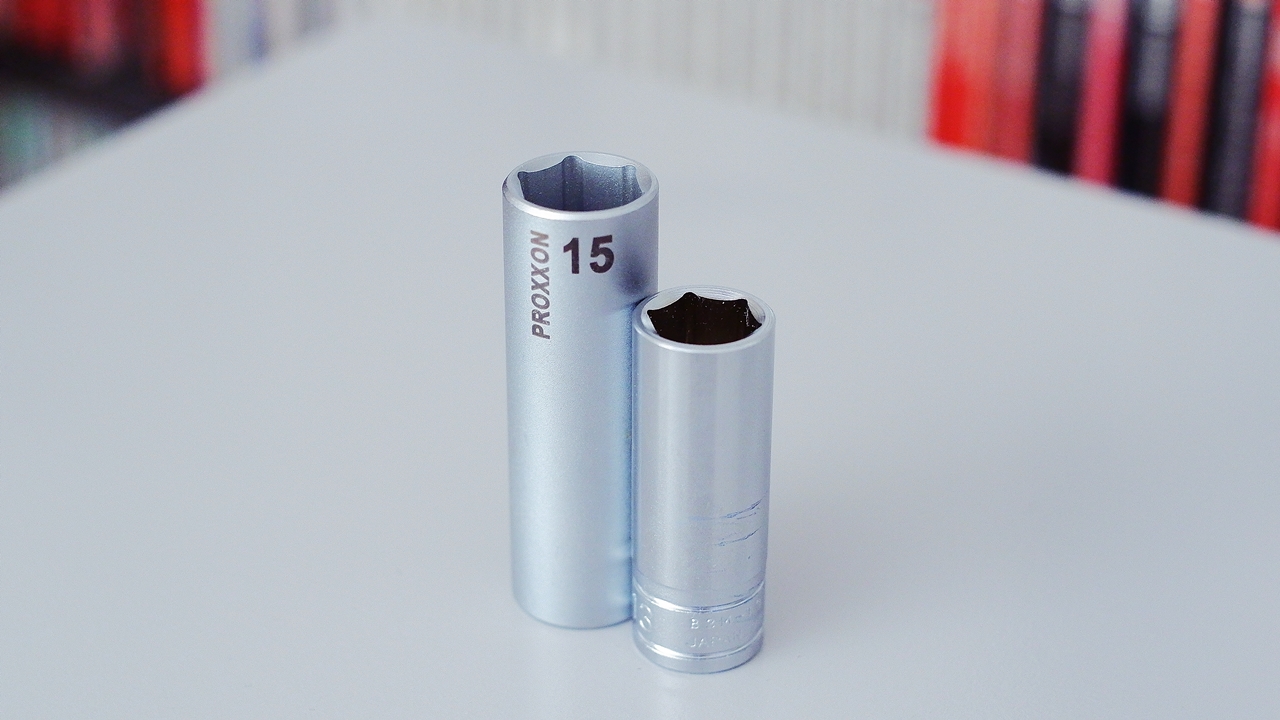
Terminals will work loose even with bare wire connections using ordinary stranded speaker cable, but in fact with Y-lug spades or solid-core wire — both of which have little elasticity — considerably more force is needed when tightening, and if the torque is insufficient they tend to loosen again even sooner. Banana plugs, which by their very nature cannot work loose over time, may actually be the most stable option of all. Loose speaker terminals will affect sound quality before you even notice, so to maintain a reliable contact at the speaker cable connection points, I would recommend checking for looseness and re-tightening at least once or twice a year. Applying sufficient torque from the front to the speaker terminals on the rear of components sitting inside a rack is surprisingly awkward, so I keep a deep socket of the matching size for each amplifier’s binding posts. Using a hex or twelve-point deep socket means that even amplifiers whose terminals are spaced too closely together to turn easily by hand can be tightened and loosened without difficulty.
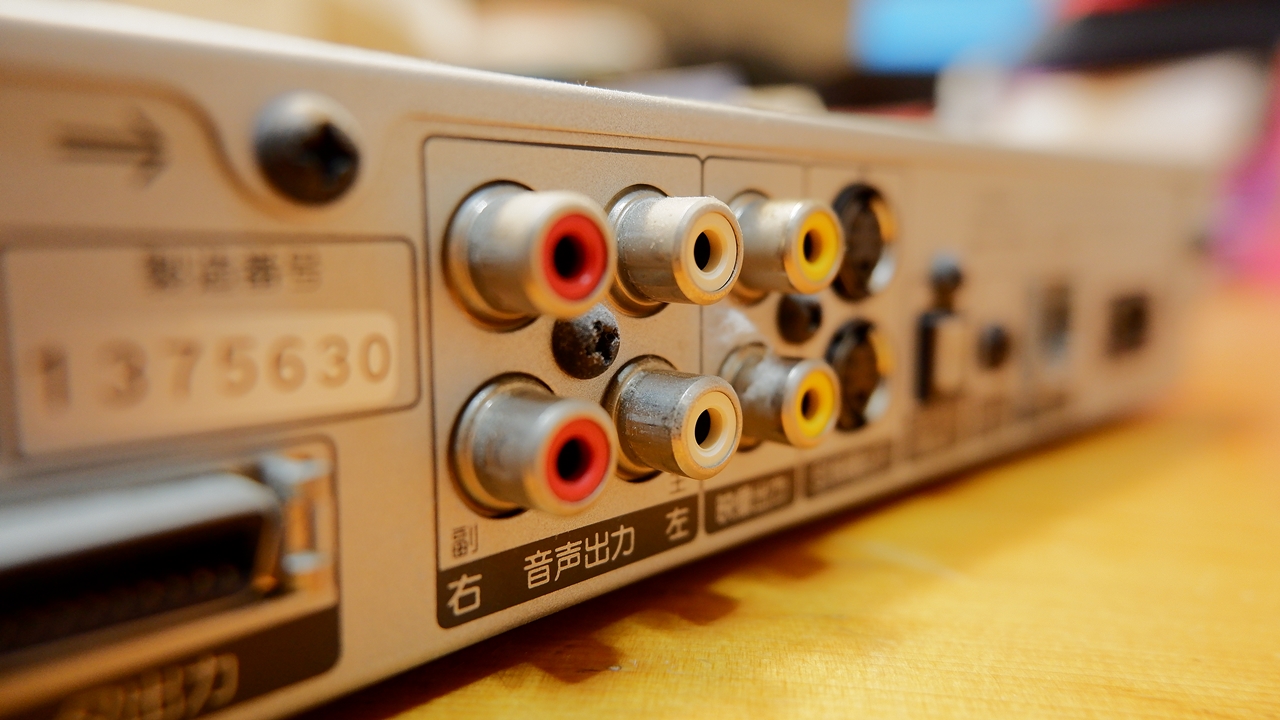
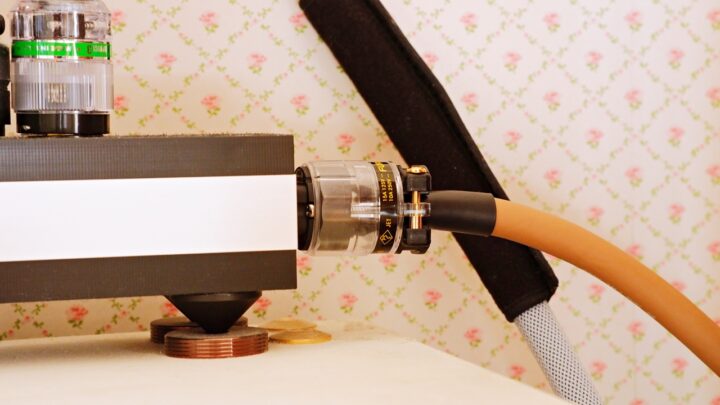
There is also this: the diameters of RCA sockets on amplifiers and other components, and of the RCA plugs on cables, vary by micron-level machining tolerances depending on the parts each manufacturer has chosen, which means an RCA plug can sometimes fail to seat fully into a socket, causing intermittent sound. (This is quite common when routing cables blind behind a rack.) You might think you have plugged something in firmly only to get no sound from one channel and realise there is a poor connection — or conversely, when a plug is too loose, pulling out a neighbouring cable can tug on it and leave it half-disconnected without your noticing…
【PR】
![]() Search for deep sockets on Amazon.co.jp
Search for deep sockets on Amazon.co.jp
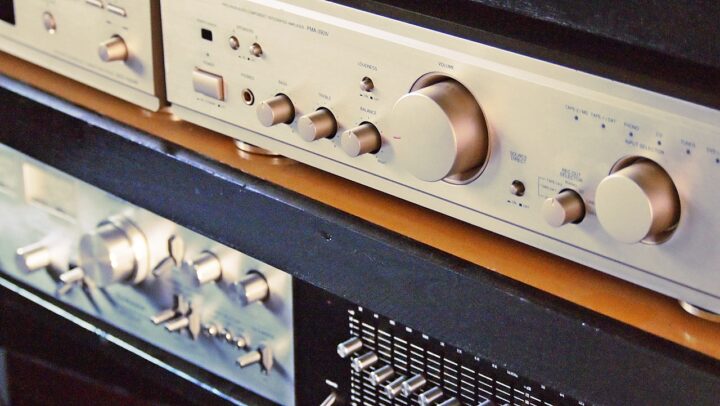
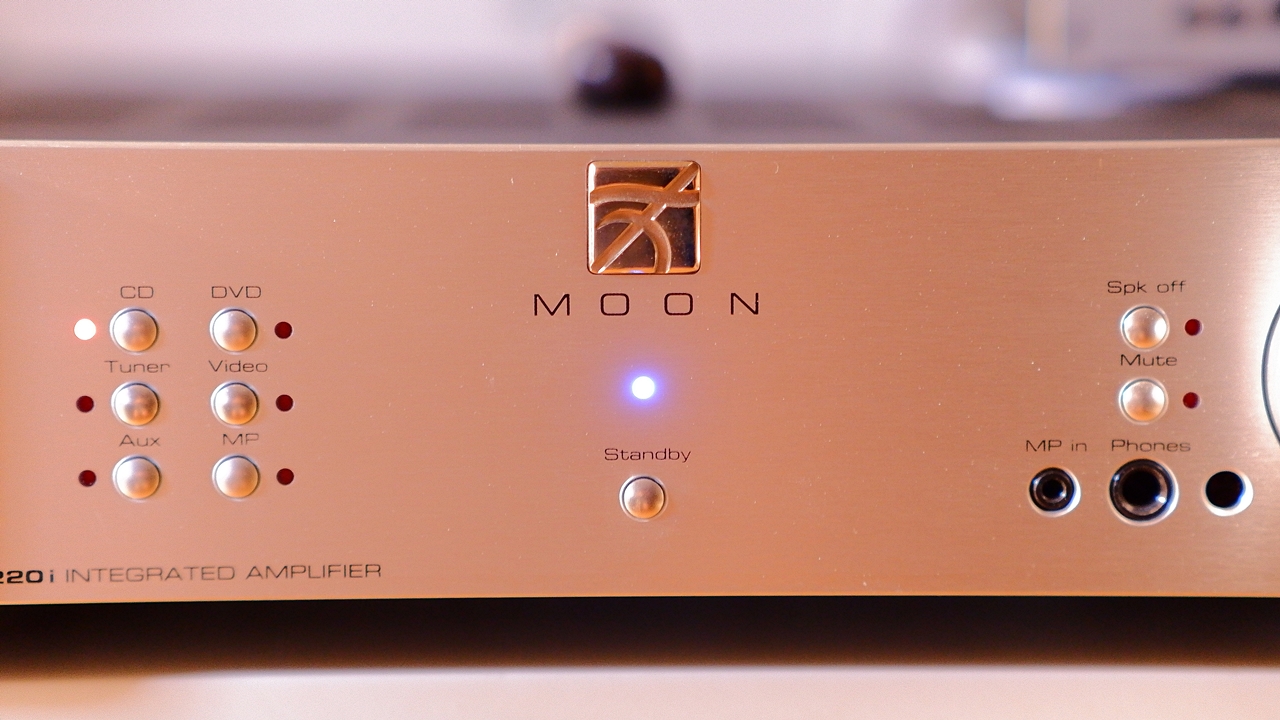
Each input terminal actually sounds different
Stereo amplifiers are typically equipped with multiple input lines, both digital and analogue, yet it is not widely known that each input terminal can sound different. The reasons behind this are thought to include differences in chassis rigidity arising from the positions of the terminals on the rear panel, the influence of mounting stress and vibration modes, and subtle impedance variations due to differences in the layout and length of internal wiring and PCB traces. That said, with an amplifier that has been used for many years, the input that has seen the most use tends to sound the best. ※ With a new amplifier, it is wise not to be bound by the labelling on the input selector, but to first determine the order of sound quality among the inputs, then assign the better-sounding inputs to the ones you will use most frequently.

Integrated amplifiers and preamplifiers typically switch between multiple input lines via a selector, and amplifiers designed a decade or more ago often came equipped with TAPE IN / TAPE OUT terminals for cassette decks. Some amplifiers label these as LINE IN / LINE OUT, REC IN / REC OUT, or RECORDER IN / OUT. Depending on the amplifier’s design, on models fitted with a mechanical selector the TAPE IN terminal follows a slightly different circuit path from the other inputs that connect through to the TAPE OUT side, and there are cases where it can deliver superior resolution and a fresher quality of sound compared to the other inputs.
A trick for using a single integrated amplifier as separates
Quite a few integrated amplifiers are internally designed with the pre and power sections kept separate, and can be switched for use as a standalone preamplifier or power amplifier independently. This is a long-standing expansion feature intended to allow future addition of a power amplifier or preamplifier to create a separates configuration, while continuing to make use of the amplifier you already own. In practice, though, you don’t often see Hi-Fi enthusiasts actually going down that route.
Among integrated amplifiers of this type, there are in fact models where the pre/power switching is not mutually exclusive but can operate in parallel simultaneously — and in such cases, a rather unconventional wiring trick becomes possible: taking the signal out from the pre-out terminal and routing it back into the power-in terminal via an arbitrary short cable (RCA or XLR). You might think that deliberately detouring the audio signal through an extra cable would only add more contact points and straightforwardly degrade the sound quality — yet, curiously enough, when a genuinely high-quality cable is used here, there is a possibility of achieving a sonically more pleasing result than what the internally integrated circuit delivers. One of the benefits of a separate amplifier configuration is that sound quality can be lifted depending on the quality of the interconnect cable connecting pre and power stages — and this very effect can be experienced with an integrated amplifier through this method.
Preventing crackling noise and poor contact caused by age-related deterioration
This is less of a concern with models equipped with the latest electronic switching selectors or electronic volume controls, but with amplifiers fitted with high-quality mechanical selectors and mechanical volume controls, atmospheric humidity and the gradual wear of use will eventually cause crackling noises to appear at certain positions on the volume, loudness control, and similar.
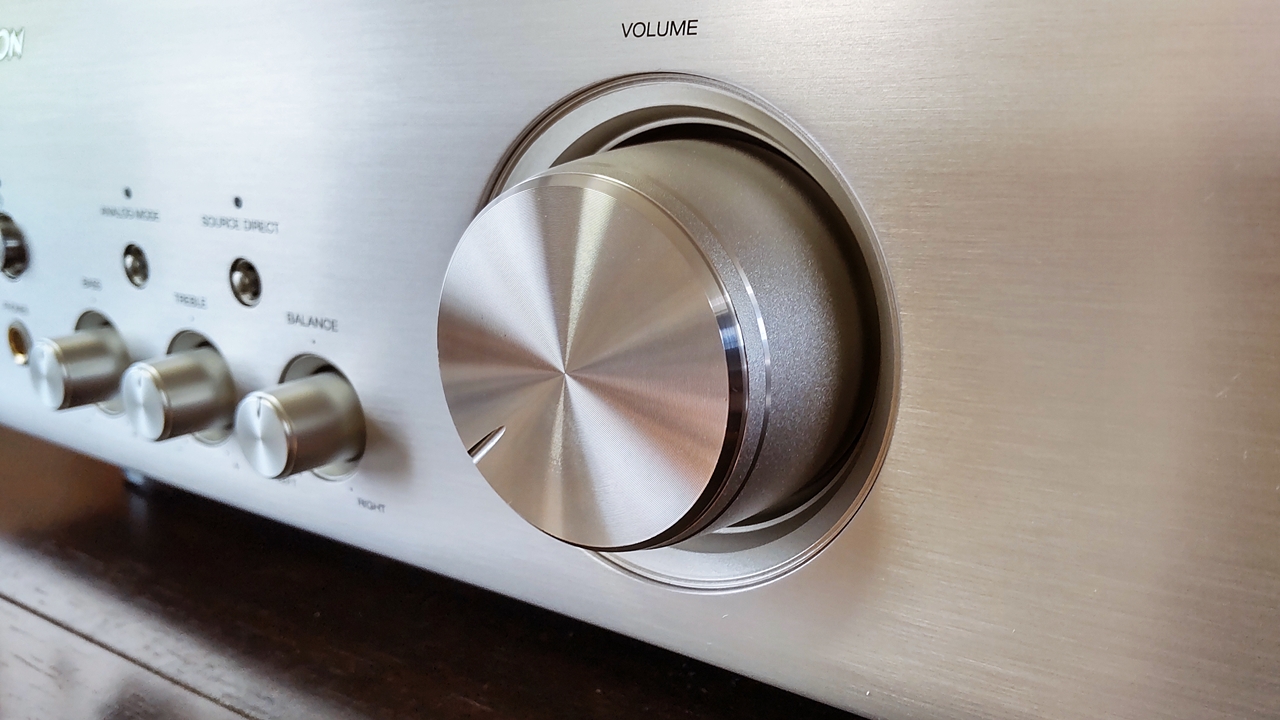
Crackling tends to develop easily in amplifiers that have been left unused for long periods or have gone without power for extended stretches of time. Keeping the amplifier powered on as much as possible, avoiding use in high-humidity environments, and regularly rotating the volume and various control knobs back and forth can all help prevent crackling from occurring in the first place, to a reasonable degree. If crackling does appear despite these measures, repeating the “spin-around” routine regularly will in most cases make it much less noticeable. When spinning the volume knob, it is advisable to turn the power off first, in order to avoid accidental overload from any sudden noise. For other controls such as the loudness control volume, selector, and balance control, doing this while the amplifier is powered on should be fine (provided the volume is turned down to a moderate level), but in any case, please avoid spinning any control at a volume position where loud sound would be passing through.
When crackling simply refuses to go away, there are cases where a contact-cleaning spray or similar is applied to the volume (variable resistor), but lubricants of this kind can sometimes have a not inconsiderable negative effect on sound quality, and when used inside a volume pot where wiping away is impossible, they bring about an irreversible change to the sound — so casual DIY use is not something I would recommend. Please think of it as a last resort, to be used only by a professional during maintenance.
As something of a digression — I have had the experience of suddenly losing sound from one channel of an amplifier one day, only to discover that the cause was a contact failure in the L/R balance control knob, which I never normally use and had therefore entirely forgotten existed. In the course of tracking down the fault, I tried giving the L/R control knob a spin, whereupon sound returned — albeit with crackling mixed in — and the matter was resolved. It took several dozen rotations before the output stabilised, and after that I made a point of moving that knob regularly, just as I do with the volume and other control knobs. Input/output terminals and moving parts that go completely unused can quietly deteriorate over time and develop contact failures before you know it. I think this is one of those things that is simply part of living with Hi-Fi equipment.
Give exposed terminals, phono sockets, AC inlets and the like an occasional clean
This applies not only to amplifiers — when the terminals on audio equipment are left exposed indoors, airborne grime and oxidation will cause them to dull over time, as though coated in a fine powder. A degree of oxidation left alone causes no functional problem, but when you come to reconnect audio cables, it is preferable to clean them back to as-new condition before doing so, for the sake of the best possible sound quality.
To restore dirty terminals to a like-new shine, various chemical products are available — contact cleaners, contact restorers, and so on. However, one thing to be careful about here is that oil-based cleaners and contact conductivity improvers, whatever the product, will alter the sound quality. I have tried a number of the contact cleaners and conductivity improvers that are commonly used, and some of them left the sound in a dreadful state after application — so whenever I see them being used on Hi-Fi equipment terminals, I can’t help but wonder what people are thinking…

Among cleaners, there are also those that contain irreversible compounds designed to abrade away the oxide film on terminals, or substances such as carbon or metal nanoparticles that, once applied, are extremely difficult to remove completely — in other words, products from which there is no full turning back in terms of sonic change, for better or worse. Even products developed specifically for audio use and claiming high sound quality will still alter the sound, and I feel it is worth thinking very carefully about whether the direction of that change truly matches the kind of sound one is aiming for.
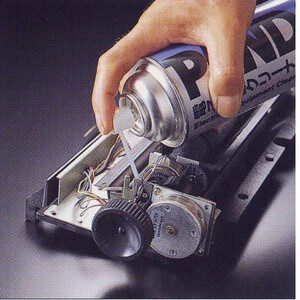
As the author of this small-world “AUDIO STYLE”, and in order to avoid any irreversible impact on sound quality, I would recommend using non-oil-based, mildly effective neutral cleaners for terminal cleaning — degreasing cleaners that leave no residue after wiping, or alcohols. However, even with those cleaners, the organic solvents they contain can in some cases be highly aggressive towards certain plastic parts, so do not forget that careful selection and application are always required — for instance, taking care not to apply contact cleaners to any plastic portions of the components. ※ PANDO 29D also warrants caution, as it contains cyclopentane, which is contraindicated for PPE.
Are RCA terminal protective caps and pin jack protectors necessary?
Protective caps for RCA terminals, XLR terminals, and other connectors — fitted over terminals as a preventive measure against the build-up of airborne contaminants and oxide film — have been known for a long time. Using this sort of product does certainly allow one to reliably prevent terminals from becoming dirty over time, but the side effect of sonic change cannot be ignored. I too, in my early days as a Hi-Fi enthusiast, had protective caps fitted on virtually every unused terminal. However, after being told by a certain Hi-Fi shop that the sonic drawbacks were considerable, I subsequently removed almost all of them, save for a few exceptions. Because amplifiers with many input and output terminals end up requiring a large number of protective caps, the natural resonances of the vinyl or soft plastic cap materials can make the overall character of the sound feel cheap. That said, as a way of making good use of a large supply of plastic pin jack protectors, I would recommend using them when storing equipment that is not currently in use, or on AV equipment where sound quality is not a particular concern. I also think it is perfectly reasonable to use them selectively on POWER IN or PHONO terminals that are not in use, purely to prevent accidental connections — a consideration that takes priority over sound quality in any case.
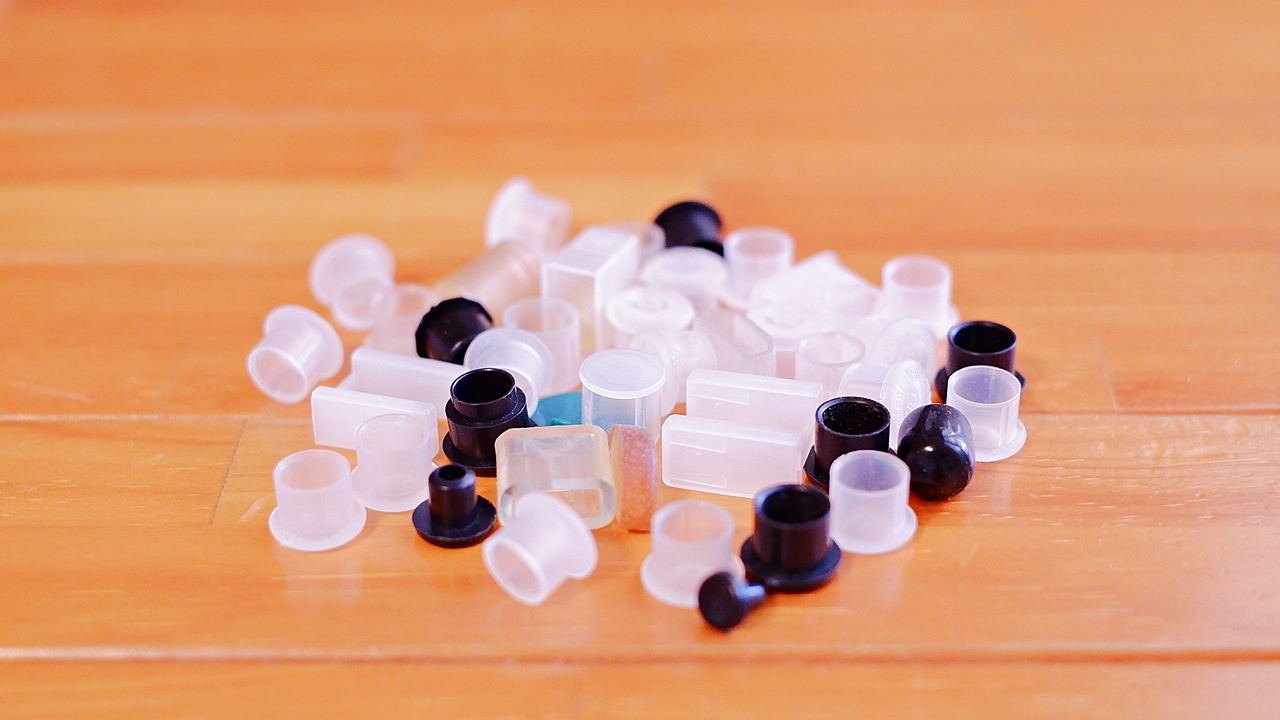
Compared to resin caps, these are considerably more expensive, but there are also terminal covers made from machined metal parts such as brass or stainless steel. Metal terminal caps and short-circuit pins for audio equipment made by audio accessory manufacturers can, when used in appropriate numbers on the right terminals, be aimed at improving sound quality. That said, unlike resin types, even a single one of these metal caps can have a noticeable effect on sound quality, and a certain sense of judgement is required to find the right positions and the right number to use — weighing up the benefits against the side effects. If you simply block every unused terminal indiscriminately, overuse will actually cause the sound to deteriorate in strange ways, so in a sense these are items better suited to intermediate-to-advanced Hi-Fi enthusiasts who are capable of taking active control of their own sound tuning.※ By the same token, the resin caps mentioned above cannot be ruled out as an option used for vibration-damping purposes — to soften a harsh, distortion-tinged sound or a stiff-sounding character.

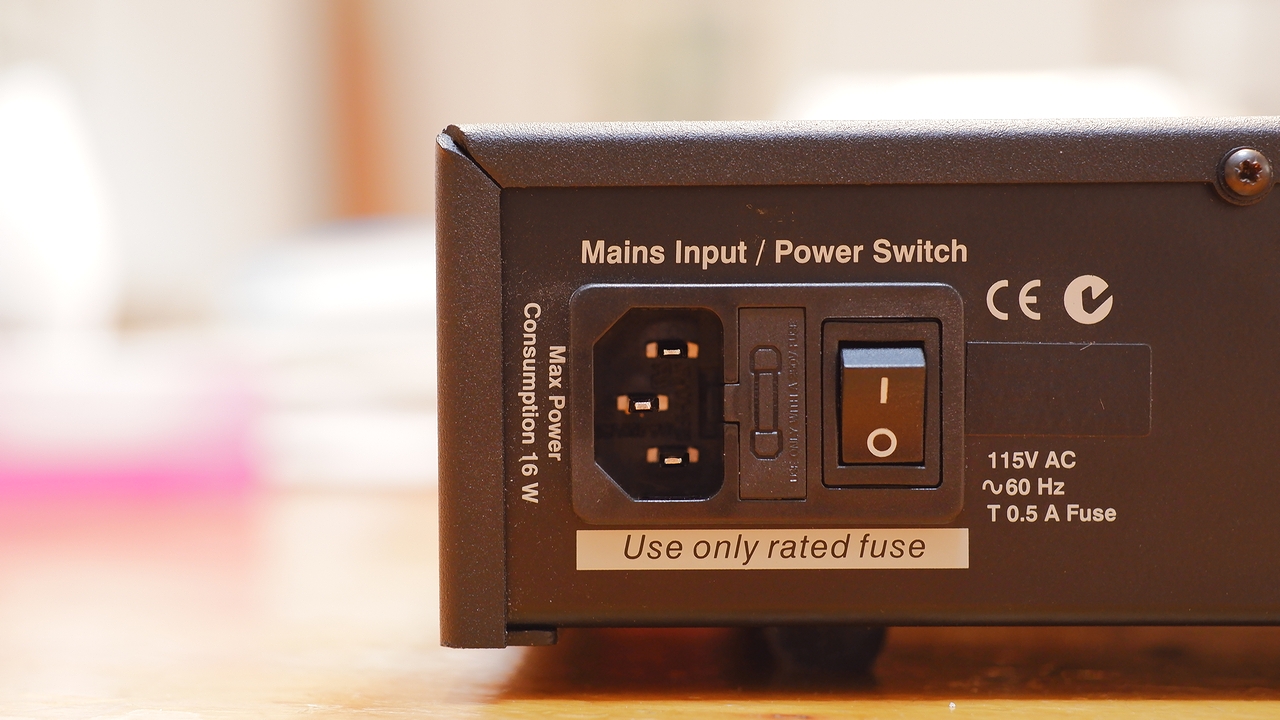
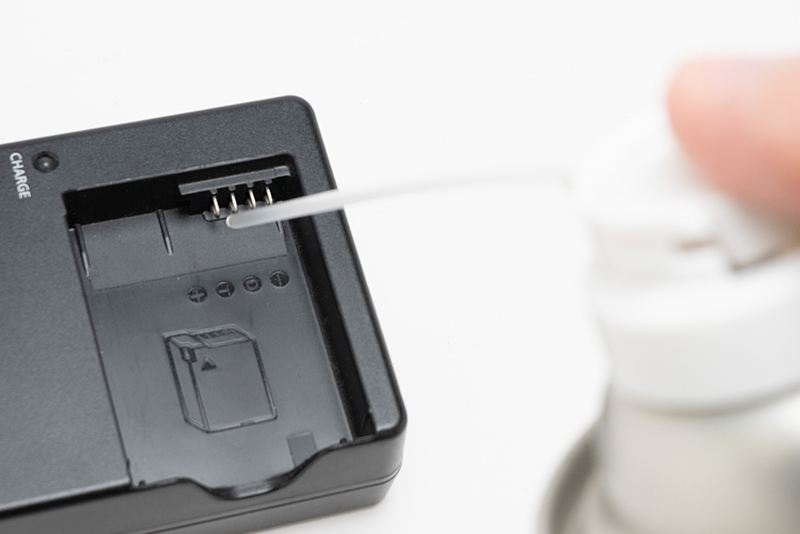
The Sound Changes from Fuse Swapping Are Not to Be Underestimated
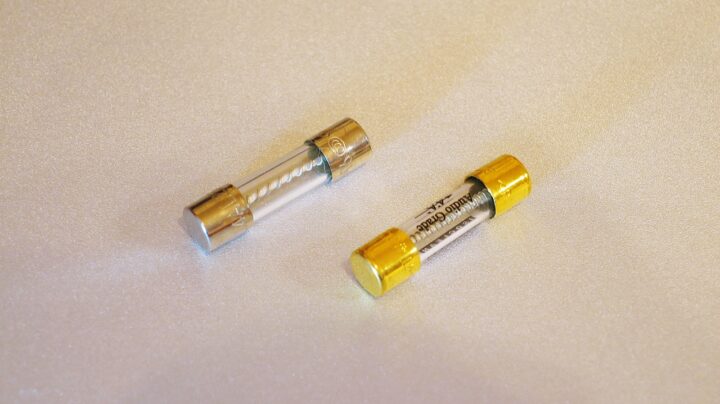
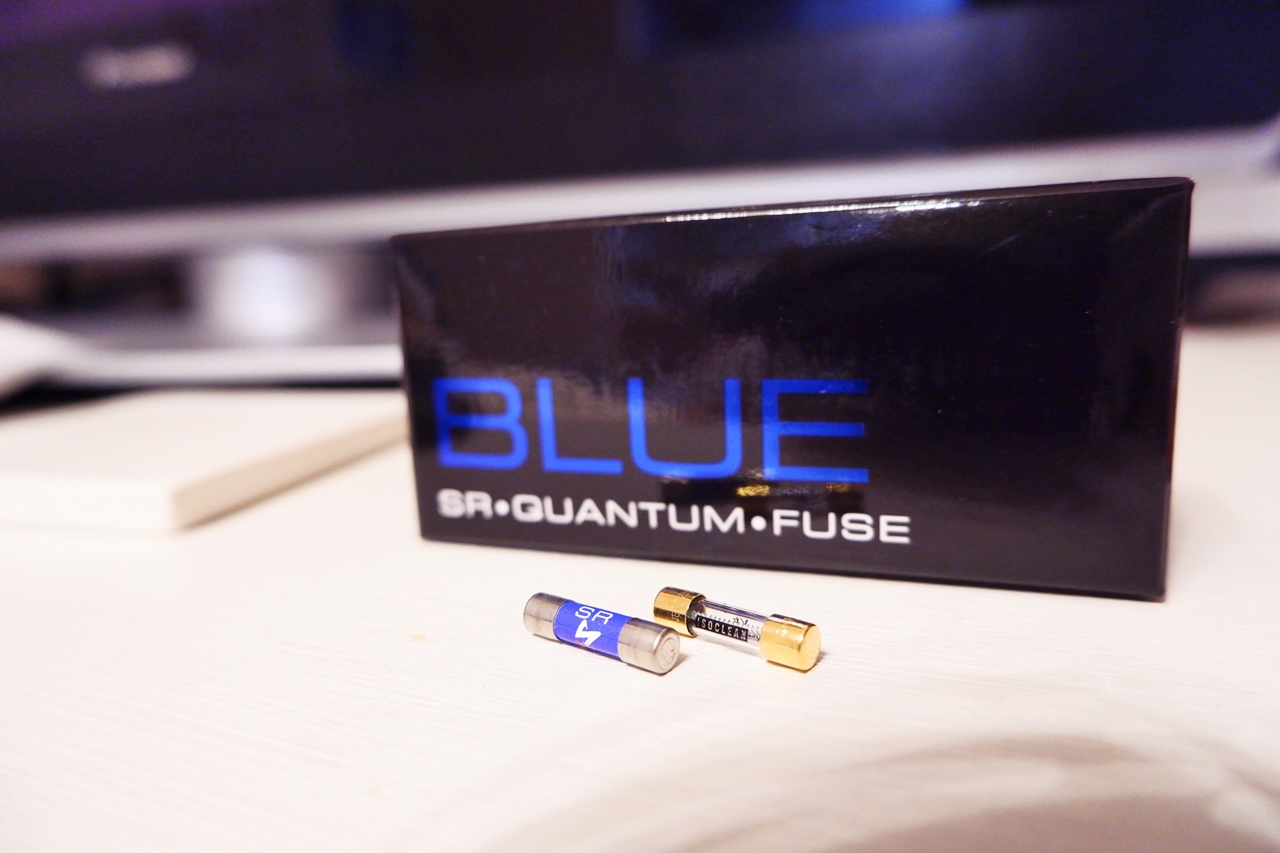
I doubt anyone other than Hi-Fi enthusiasts who build their own amplifiers as a hobby would be reckless enough to go poking directly at amplifier circuitry, but one component that even someone with no background in electrical engineering might reasonably consider replacing is the glass tube fuse — the kind that can be swapped out by the user depending on the amplifier. Because the sound of an amplifier or other audio equipment can change quite noticeably depending on which fuse is fitted, there exists a whole range of so-called high-quality replacement fuses sold as audio accessories.
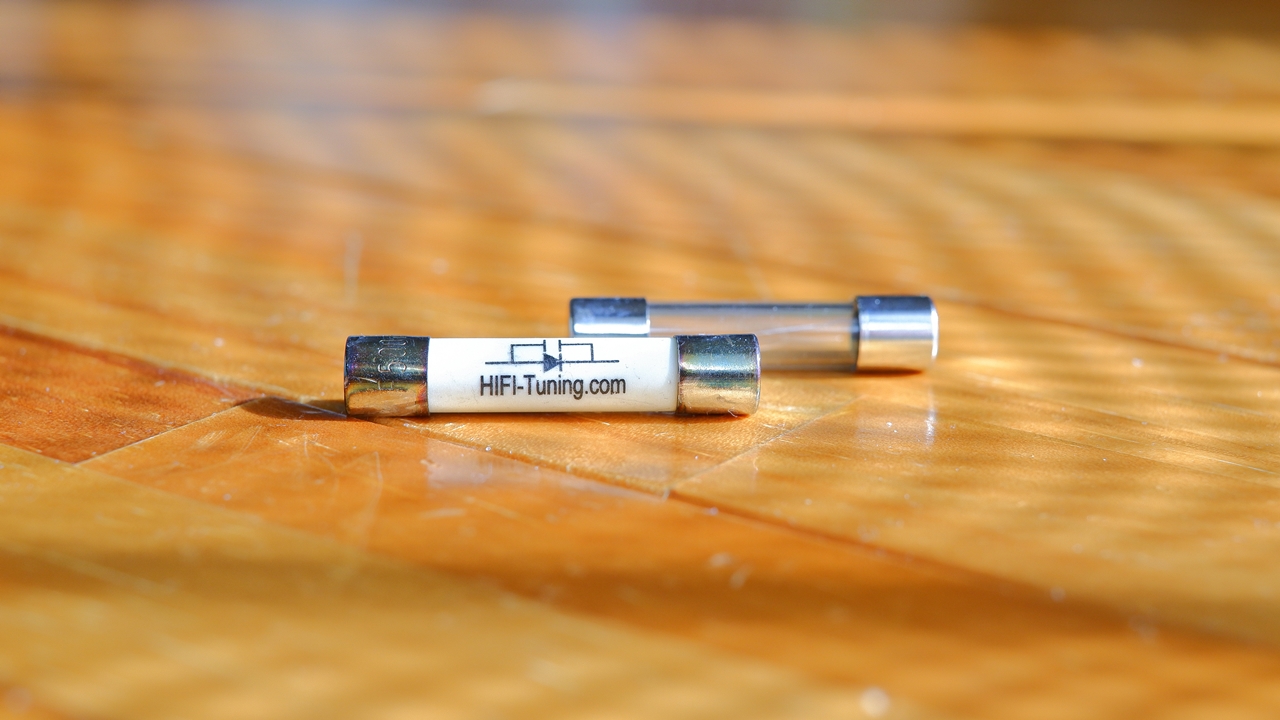
Replacement fuses sold as audio accessories are expensive, but they have been carefully selected for their sonic qualities, and in many cases they do sound better than the industrial general-purpose glass tube fuses that come fitted in equipment as standard. That said, I have also had experiences where the stock fuse turned out to be the better match sonically, and even among cheap generic fuses, the sound can vary quite considerably from one product to the next. On top of that, simply reversing the orientation of a fuse can make a fair difference to the sound — so the rabbit hole of fuse-related sound quality is quite a deep one.
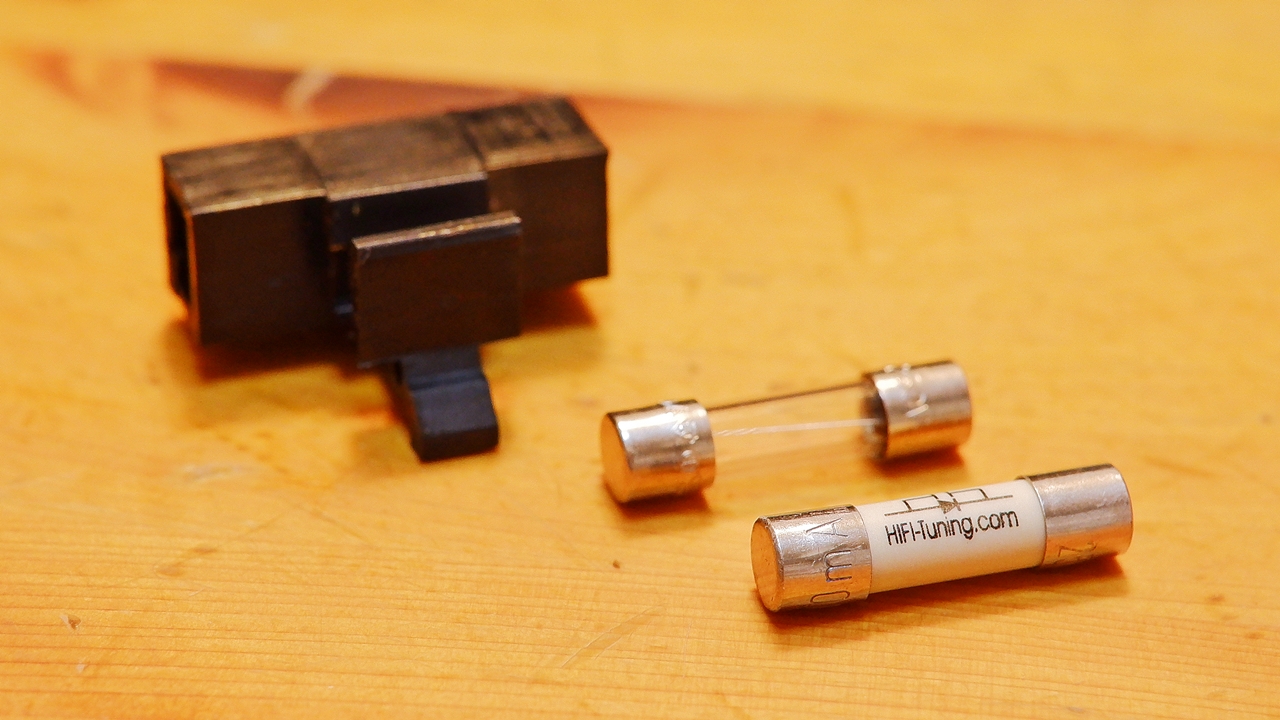
Standard glass tube fuses come in two sizes: the larger 32 mm type and the smaller 20 mm midget fuse. The rated amperage indicates the current value at which the fuse will physically blow if exceeded, and there are two types: the fast-blow (FB) for immediate interruption, and the slow-blow (SB) with a time-lag. These specifications are always clearly stated either at the fuse holder on the equipment itself or in the instruction manual, so when replacing a fuse, you should as a rule always use a fuse matching the stated specification.
Among the various faults that can afflict an amplifier, a blown fuse is extremely common, and it is not unusual for a fuse to blow due to a sudden overcurrent of unknown cause — fluctuating mains conditions, for instance. I have personally experienced, on several occasions, an amplifier suddenly refusing to power on, only to send it in for warranty repair and discover it was nothing more than a blown fuse (Musical Fidelity A1 Junior, among others). Partly because of this, some overseas amplifier manufacturers include spare replacement fuses in the box alongside the manual as a matter of course. It should be noted that if a replacement fuse blows again immediately, a more serious fault is possible, in which case one should resign oneself to sending the unit in for repair.
![]() 【PR】Soundhouse: Introduction to Lighting > Power Connectors & Fuses
【PR】Soundhouse: Introduction to Lighting > Power Connectors & Fuses![]()
On a fairly large number of units, the holder cover or socket cover for the mains fuse is located beside the rear-panel AC inlet (IEC), but there are amplifiers where the top panel must be removed and the internal circuitry accessed before the fuse can be replaced. Please be aware that on such products, if the user carries out the fuse replacement themselves, this may in some cases void the manufacturer’s warranty.
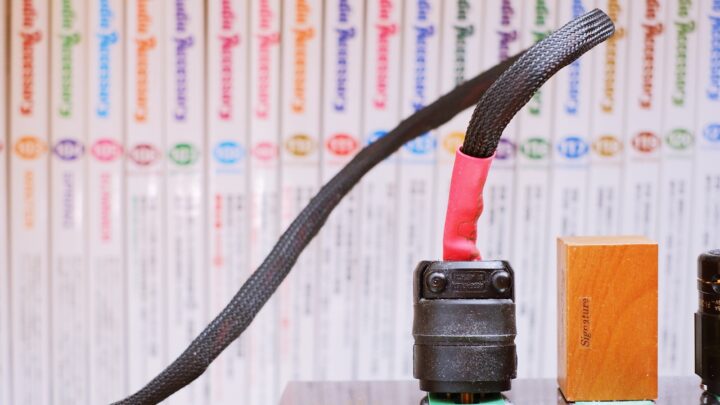
Replacing the Power Cable
Among typical Hi-Fi enthusiasts today, this is overwhelmingly more common than fuse replacement. With amplifiers and other audio equipment where the power cable is detachable, replacing the power cable can — and this may sound somewhat overstated — sometimes bring about a transformation so dramatic it rivals swapping out the amplifier itself. Within the broad category of audio cables, power cable replacement on an amplifier is, in my experience, the single point where the audible degree of change tends to feel the greatest. Among the various types of audio cables, power cables in particular offer a large amount of perceptible change relative to the investment required, and in that sense they could be said to offer better cost-value than signal cables or speaker cables.
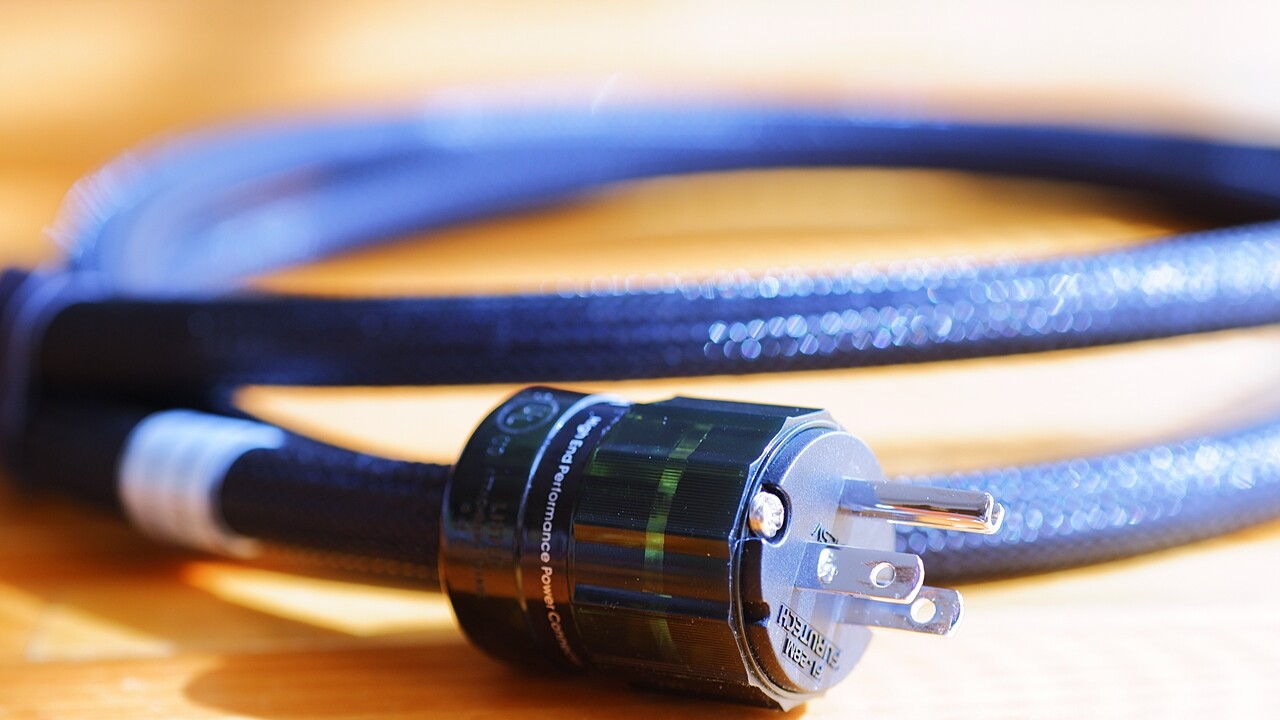
If you want to experience a significant change as affordably as possible, it is also possible to obtain a power cable with better cost performance than a finished retail product by sourcing audio-designed cut-length power cable and separately acquiring mains plugs and inlet plugs, then assembling them yourself. It is entirely at your own risk, but for those of you who have a basic knowledge of electrical work, are good with your hands, and have some experience with simple assembly — I would recommend giving DIY power cable construction a try.

Mains voltage, frequency, and the effects of external noise
The household mains supply in Japan is nominally 100V ±6V at 50/60Hz, but in practice there is variation depending on region and time of day, with some households averaging below 100V and others above. Even within the same home, the voltage drops the further you are from the main distribution board. It is widely known that 60Hz tends to produce better sound quality than 50Hz, and that a higher voltage — rather than a lower one — is said to be sonically preferable.
Japan’s standard voltage is a low 100V to begin with, which puts it at a disadvantage compared to the US at 115V — and at an even greater disadvantage compared to the 200–240V regions of Europe. It is worth bearing in mind, therefore, that foreign-made products — amplifiers and other components alike — will tend to sound somewhat less energetic, more passive, and more nervous than the sonic character their designers originally intended.
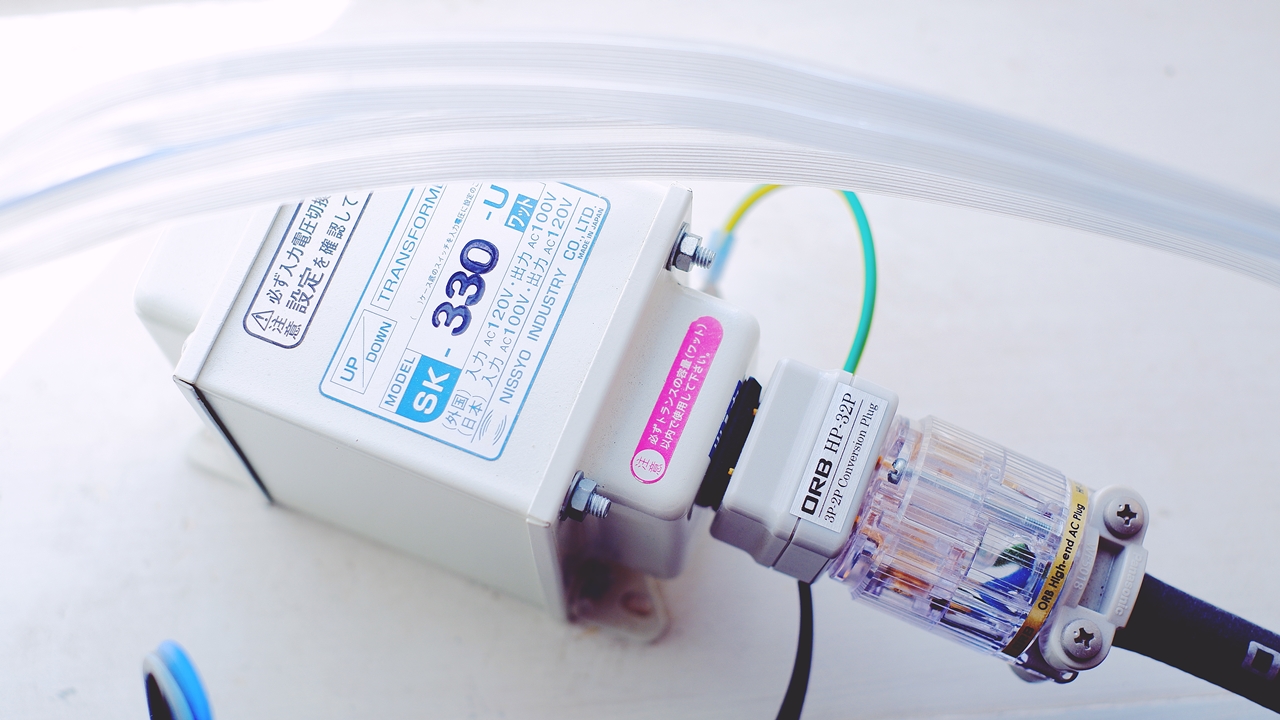
For this reason, there are a certain number of high-end enthusiasts in Japan who have gone so far as to install a dedicated 200V mains supply (the work itself is straightforward) and import 200V-spec products from abroad to use with it. I myself use a 100V→115V step-up transformer with some of the US-spec products I have imported, and the sense of energy on listening is altogether different compared to running them at the lower 103V. That said, for an ordinary household where domestic and foreign audio products coexist, the reality is that there is little option but to make the best of 100V-spec products as they are.
Depending on the living environment, there can also be a considerable amount of external noise finding its way into the household mains, making it genuinely difficult to obtain the low-noise, reasonably high-voltage supply (ideally at 60Hz) that would be most desirable from a sound quality standpoint. I suspect it is not uncommon for an environment where even expensive Hi-Fi equipment sounds somehow muffled and murky, and where changing cables makes little difference, to have its root cause in the mains supply itself.
In environments where noise is not particularly severe, a simple parallel-connected noise filter plugged into the mains socket can provide a certain degree of effect. However, if the power supply environment is so poor that it feels like a fundamental bottleneck affecting sound quality, it may well be worth considering the introduction of a clean power supply, designed specifically for audio use, at the very source of power feeding your Hi-Fi equipment.
The need to clean dust that has accumulated inside an amplifier
Unlike sealed audio equipment that generates little heat, one structural problem faced by amplifiers used in the home is house dust entering through the top panel. Through the ventilation slots on the top panel found on most amplifiers, house dust gradually works its way inside, accumulates, raises the temperature within the chassis, degrades sound quality, attracts static electricity, and — in the worst case — may cause the amplifier to fail. Personally, I had an experience with the ONKYO A-917 I used during my student days, where dust that had built up around the relay caused the amplifier to stop powering on.
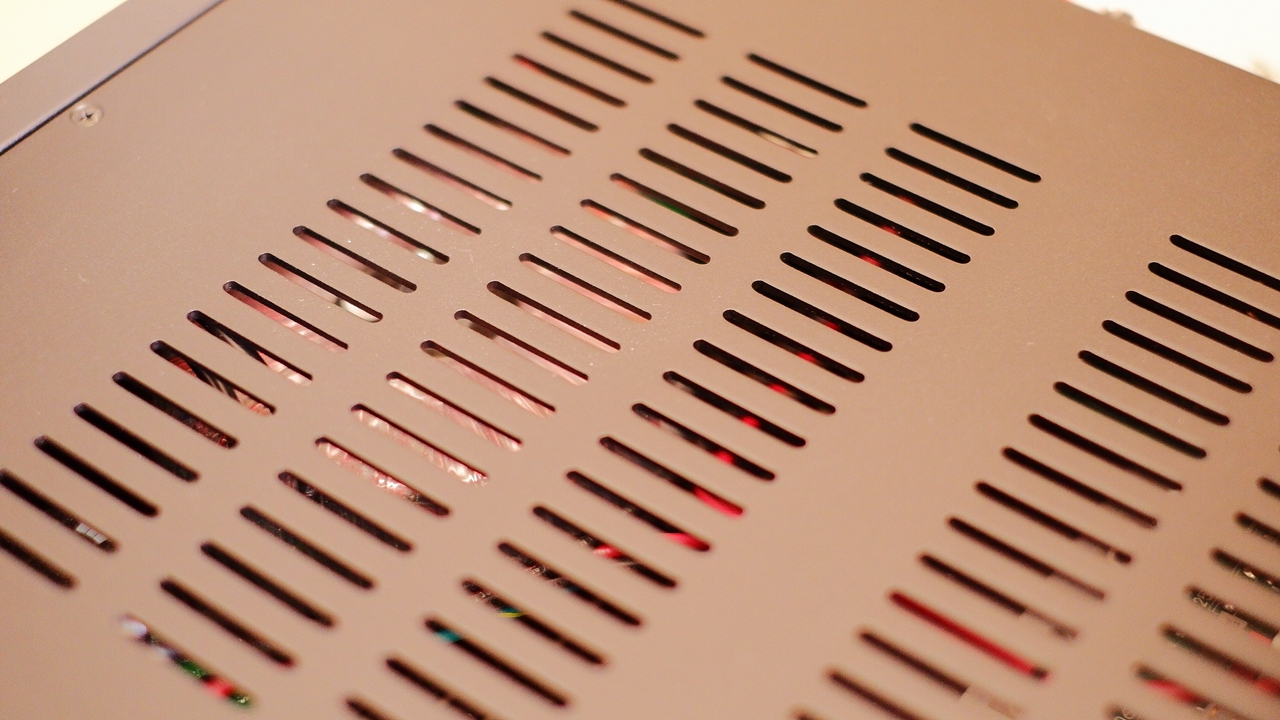
As a prerequisite, this is naturally not recommended for anyone who is not particularly handy or has no knowledge of electronics whatsoever. But where it is feasible, I personally feel it is desirable to open the top panel periodically — once a year or so — and use the soft brush nozzle of a vacuum cleaner to draw out the dust that has accumulated inside, making appropriate use of an anti-static brush along the way. Needless to say, there is of course the risk of knocking the nozzle against something and damaging a circuit component in the process, and this is entirely at one’s own risk, outside the scope of any manufacturer warranty.


Insulators to place under an amplifier
Ordinarily, audio amplifiers come fitted with rubber or moulded resin feet at four points (occasionally three). This presents no particular functional problem as it stands, but in the case of amplifiers designed within tight cost constraints, only the bare minimum of cost is devoted to the feet, and models where genuinely ideal, acoustically considered design has been applied in this area are few and far between. For this reason, by deliberately substituting aftermarket Hi-Fi insulators with good vibration-absorbing properties and a favourable material resonance in place of the original feet, one can experience acoustic benefits comparable to placing the amplifier on a quality Hi-Fi board.
As a general rule, the effects of Hi-Fi insulators show up most strongly under speakers, which receive the greatest direct vibration from the cabinet — and so components such as amplifiers and CD players tend to get pushed to the back of the queue and overlooked. Even so, when you actually try insulators under your audio components, quite a few Hi-Fi enthusiasts find that the change in sound quality is at a level you simply cannot ignore, one that can shift the overall tonal character of the entire system.
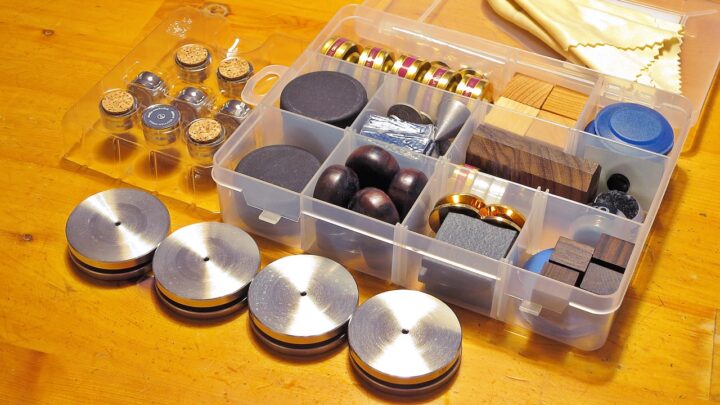
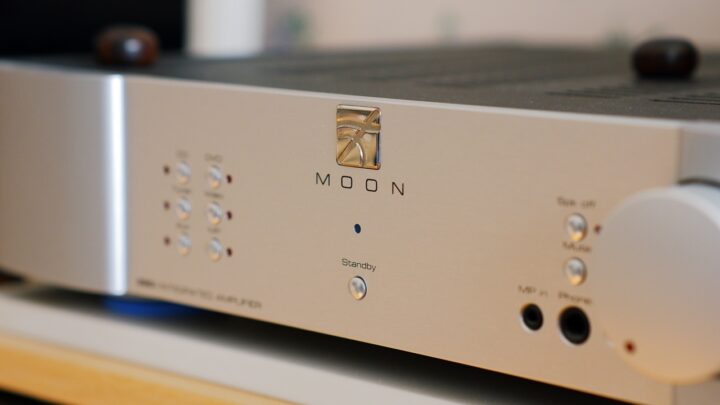
↑ The entry above is a comparison test using a Moon by Simaudio integrated amplifier, examining the sonic merits and drawbacks of various commercially available Hi-Fi insulators.
~ Summary ~
It has turned into quite a long piece — 15 Tips in total — but in this supplementary instalment, written from the perspective of the author behind the compact-world “AUDIO STYLE”, I have tried to gather together points on amplifier operation that were not covered in the previously introduced WHAT Hi-Fi article on seven mistakes to avoid with audio amplifiers. If even a small part of the know-how here proves useful — not only for those new to Hi-Fi but also for intermediate and more experienced enthusiasts — in the pursuit of better music playback, then as one Hi-Fi enthusiast writing from the margins, I could not be more pleased.
【Better Practices for Pure Hi-Fi Amplifiers】
7 Mistakes|15 Points to Watch